But Word has a lot of formatting settings that are adjustable, and the orientation of the document is one. So if you find that the majority of documents you create need to be in the landscape orientation, then you might prefer for that to be the default setting. Our guide below will show you how to adjust the default orientation in Word 2016 to landscape so that you can more easily create the documents that you require.
How to Create Landscape Documents by Default in Word 2016
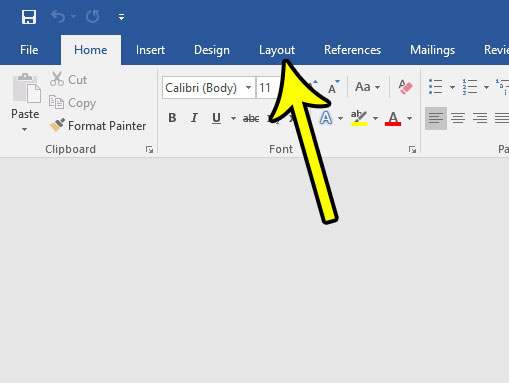
The steps in this article were performed in Microsoft Word 2016, but will work in some earlier versions of Word as well. This is going to change the default orientation setting for all future documents that use the current document template. If you wish to revert to the portrait orientation as the default at some point in the future, then you will need to adjust the default orientation again by following these same settings. Step 1: Open Word 2016. Step 2: Click the Layout tab at the top of the window.
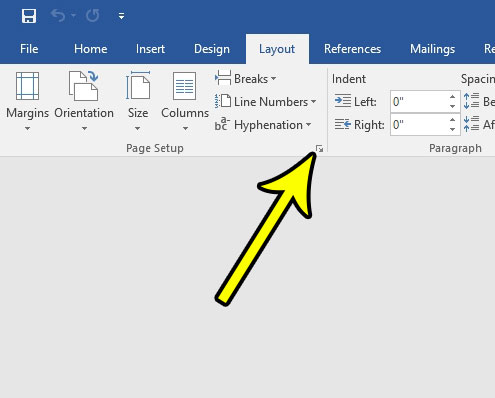
Step 3: Click the Page Setup button at the bottom-right corner of the Page Setup section of the ribbon.
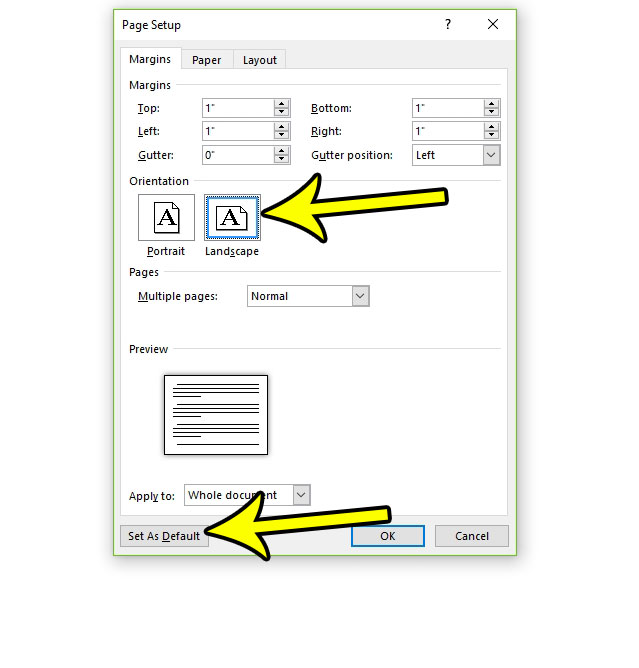
Step 4: Click the Landscape option under Orientation, then click the Set as Default button at the bottom-left corner of the window.
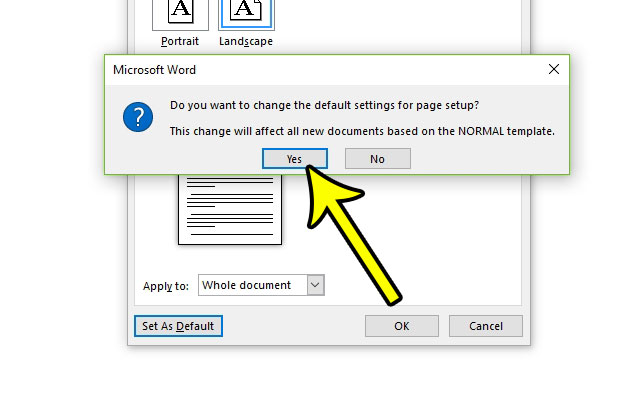
Step 5: Click the Yes button to confirm that you wish to change the default orientation setting for the current template.
If you create a new document it should be using the landscape orientation. Do you have a document that’s using the wrong font? Or does the document have a mixture of different fonts that is not very appealing? Learn how to change the font for your entire document in Word so that you have a more cohesive look to your work. He specializes in writing content about iPhones, Android devices, Microsoft Office, and many other popular applications and devices. Read his full bio here.


