Using Wrap Text in Excel 2010
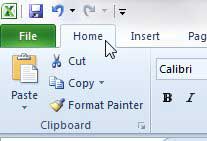
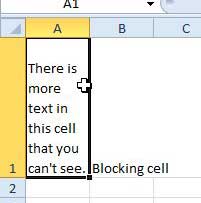
Excel is automatically going to to determine the necessary row height for the information contained within your cell. The current column width will remain the same once you click the Wrap Text button. If you find that, after using the Wrap Text tool, you are not happy with the appearance of the data displayed inside the cell, you can manually increase the column width or the row height until you are happy. Step 1: Open your spreadsheet in Excel 2010. Step 2: Click the Home tab at the top of the window.
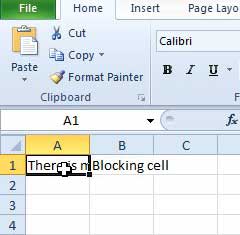
Step 3: Click the cell containing the text that you want to display.
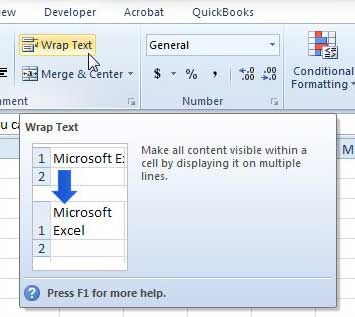
Step 4: Click the Wrap Text button in the Alignment section of the ribbon at the top of the window.
All of the text inside the cell will now be visibly displayed on your spreadsheet.
As mentioned previously, you can manually resize the rows and columns as needed to improve the appearance of the text as well. Our article about how to fit a spreadsheet on one page in Excel 2010 offers an easy option to simplify Excel printing. After receiving his Bachelor’s and Master’s degrees in Computer Science he spent several years working in IT management for small businesses. However, he now works full time writing content online and creating websites. His main writing topics include iPhones, Microsoft Office, Google Apps, Android, and Photoshop, but he has also written about many other tech topics as well. Read his full bio here.
You may opt out at any time. Read our Privacy Policy