WiiMote as a Windows 7 Device
Using your WiiMote as a Windows input device is made possible due to the work of Carl Kenner, a tree-hugging geek (those terms are meant endearingly) who developed GlovePIE, as well as the work of Office Labs, who put together a GlovePIE script that turns the WiiMote into a pointer/mouse with gestures that work in PowerPoint’s pptPlex add-on. To start, you’ll need a computer with a Bluetooth receiver—either built-in or as a USB dongle. Also, you should grab the latest version of GlovePIE from GlovePIE.org, which, when I tried earlier, was down. If it’s not back yet, you may want to grab an earlier version from one of these mirrors: MediaFire, RapidShare, Google Pages. While GlovePIE is downloading, hop on over to Office Labs and grab their GlovePIE script, which is called PlexMouse.txt. PlexMouse maps the buttons on the Wii Remote to the mouse buttons. PlexMouse also has an option that lets you turn the mouse cursor into a laser pointer when you’re viewing a PowerPoint slideshow. To enable this, you have to edit the registry. There are instructions for enabling this on the page I linked earlier in this paragraph, but it’s easier to download these two .reg files and run them accordingly. One of them turns the laser pointer on, and the other turns it off. Now, after you have all that stuff downloaded, follow the steps below and/or watch the following video I made:
Step One
Pair your Wii Remote to Windows. If you have a Bluetooth icon in your system tray, right-click it and click Add a Device. Otherwise, type Add a Bluetooth Device into the search field in your Start Menu.
Step Two
While Windows searches for discoverable devices, open the battery cover on the back of your Wii Remote and press the red Sync Button once and release it.
Step Three
When the device appears in the Add a device dialog, select it and click Next.
Step Four
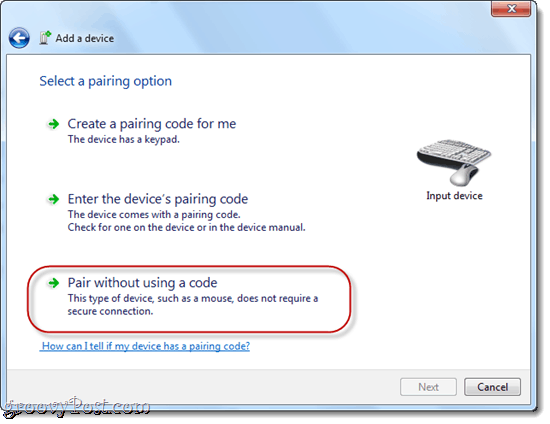
Select the third option, which reads Pair without Using Code.
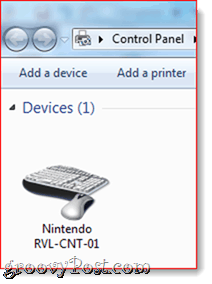
Now, Windows should install the drivers automatically. This could take a few moments. If it fails the first time, try again. It took me two or three tries before the connection stayed stable. You can double-check to see that it was installed correctly by right-clicking the Bluetooth icon in the system tray and clicking Show Bluetooth Devices. If it worked, you’ll see a device called Nintendo RVL-CNT-01.
Step Five
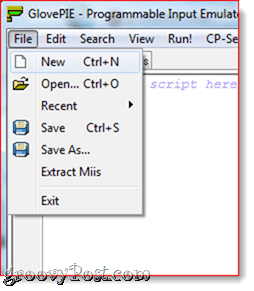
Launch GlovePIE and click File > Open. Navigate to the PlexMouse.txt file you downloaded from OfficeLabs. Note: You may have to change the file type in the Open dialog to All Files.
Step Six
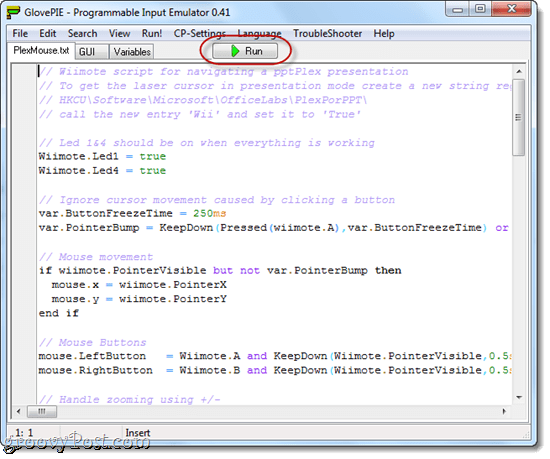
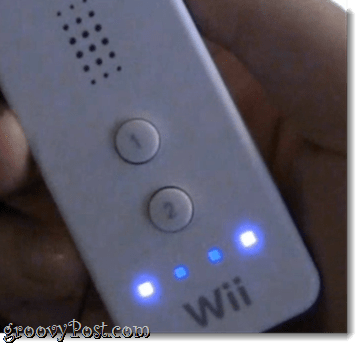
Click Run. If the Wii Remote is connected properly, the first and fourth LED lights will be illuminated.
Personally, I had a bit of trouble with this, so you may have to try several times. What finally worked for me was running the script in GlovePIE, and then with it still running, I removed the Nintendo RVL-CNT-01 device from the Show Bluetooth Devices screen and then synced it again just by pressing the 1 and 2 buttons on the Wii Remote.
Step Seven
You should now be able to control the mouse buttons with the Wii Remote. The A Button is left click, and the B Button is right-clicked. But wait, you ask. How do I control the mouse pointer with the Wii Remote? Well, for that, you’ll need a Wii Remote Sensor bar. You do have one, right? Now, you won’t be able to plug it into your computer, so you’ll have to use one of those battery-powered wireless Wii Remote Sensor bars. Or… You could make your own. Stay with me—remember, I said that this would be easy, and I intend on keeping that promise.
Rolling Your Own Homemade Nintendo Wii Sensor Bar
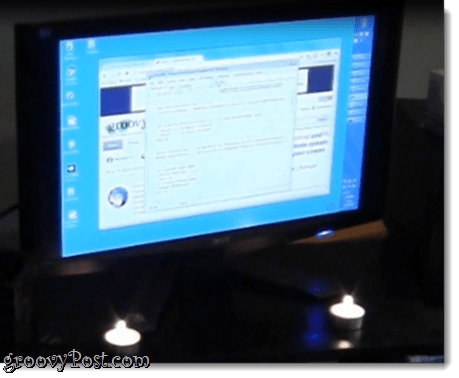
The beauty of the Wii Remote and the Wii Remote Sensor bar is that the motion-sensing technology is driven by an optical sensor on the front of the Wii Remote, which does little more than using the two lights on the Wii Remote Sensor bar as reference points. So, to make your own Wii Remote Sensor bar, all you have to do is set up two constant sources of light about 12 or so inches apart from one another in front of your monitor. Personally, I find that two tea lights work exquisitely. Not only do you get a homegrown Wii Remote Sensor bar for your computer, but you also make it seem like you’ve created a mini-shrine for your PC. It feels very ceremonial.
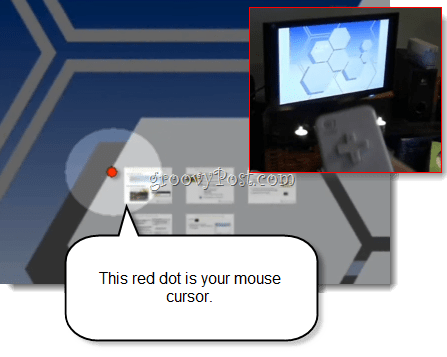
Now, with your homebrew Wii Remote Sensor in place, you should be able to position the mouse cursor by pointing it at the screen, just as you do with the Nintendo Wii and your TV. Groovy. However, you’ll notice that the tracking is kind of shaky, especially if you have unsteady hands like me. Your wavering cursor isn’t particularly conducive to clicking hyperlinks and tiny little scrollbars, either. That’s why the Nintendo Wii’s Opera browser is modified as such. You could make your computer a bit more Wii Remote friendly using the Accessibility features built-in to Windows, but it’s not really worth it. However, you can use PowerPoint with your Wii Remote, which does make a little more sense. To activate the laser pointer feature, run the pptPlexWiiOn.reg file you downloaded earlier. Start your slide show and use the following gestures to control your presentation:
Flick the Wii Remote to advance one slide.Hold 1 and flick the WiiMote to move to the previous slide.Hold 2 and flick the WiiMote to go to the next section.Press + to zoom in.Press – to zoom out.Press the Home button to zoom out to the overview of the presentation. (pptPlex)Double Press A to zoom in on a section or slide. (pptPlex)Press and hold A to pan the presentation (pptPlex)Press B to zoom out one level.
And there you have it. Not incredibly useful for normal Windows tasks, but if you feel like outing yourself as a total nerd at your next business presentation, this should do the trick groovyPost style. For more GlovePIE scripts, check out this forum, which has GlovePIE scripts for various applications and games, including GlovePIE scripts for the Nunchuck and the Wii Classic Controller. Thank you Comment Name * Email *
Δ Save my name and email and send me emails as new comments are made to this post.
![]()


