But you might be finding that your apps are receiving modifications that you don’t like as new app versions are released, and that you would prefer to continue using the older versions of apps that you already have and are accustomed to working with. Fortunately the update setting on your iPhone is configurable, and you can choose to turn off automatic app updates on the device. That way you have control over which apps can be updated. This manual method of updating your iPhone apps can be somewhat tedious, but it can be worth it if you find that some automatic app updates are causing you problems.
How to Disable Automatic App Updates for Your iPhone 7
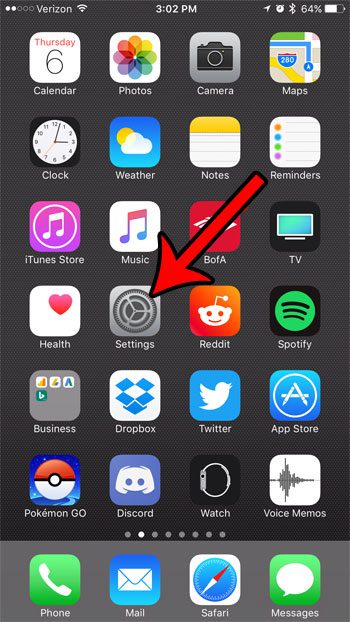
The steps in this article were performed on an iPhone 7 Plus, in iOS 10.3.2. Once you finish the steps in this guide, your iPhone will no longer automatically install app updates that are available for your device. You will need to check for and install those updates yourself. This article can show you how to do manual app updates on your iPhone. Step 1: Open the Settings menu.
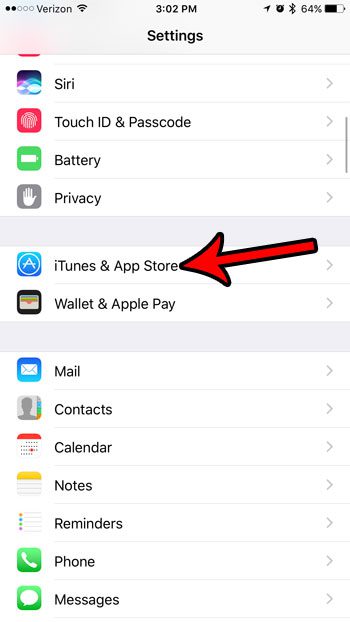
Step 2: Select the iTunes & App Store option.
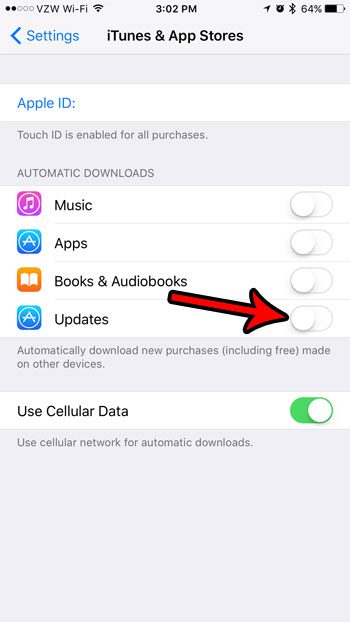
Step 3: Touch the button to the right of Updates. This should move the button to the left, and also remove any green shading around the button. The automatic app updates have been disabled on the iPhone in the picture below.
Are you often out of space on your iPhone, making it impossible to install new apps, take picture, record videos, or generally do almost anything on your device? Read our guide to clearing out iPhone junk for some tips that you can use to free up some space. After receiving his Bachelor’s and Master’s degrees in Computer Science he spent several years working in IT management for small businesses. However, he now works full time writing content online and creating websites. His main writing topics include iPhones, Microsoft Office, Google Apps, Android, and Photoshop, but he has also written about many other tech topics as well. Read his full bio here.
You may opt out at any time. Read our Privacy Policy


