There are a number of ways to accomplish this, including transferring them to a computer. Our tutorial below will show you how to transfer iPhone photos to PC using a cable that you already have.
How to Import Images from iPhone to Windows
Our guide continues below with additional information on how to transfer iPhone photos to PC, including pictures of these steps. The camera on your iPhone probably gets a lot of use. Whether you are taking pictures of family or pets, or things that you see out in the world, it’s likely that you have a lot of pictures and videos on the device that you would like to save. While uploading those files to someplace like iCloud, Dropbox, or Google Drive is a good solution, you might want to save them to your computer instead. Luckily your iPhone integrates well with your Windows PC, and you are able to offload images from the Apple smartphone to your computer using the same cable that you use to change the iPhone. Does your iPhone screen turn off a lot when you don’t want it to? Find out how to keep iPhone screen on by changing a setting on the Display menu.
How to Send Pictures from an iPhone to a Windows Computer (Guide with Pictures)
The steps in this article were performed on an iPhone 13 in iOS 15.5 I am also using a laptop computer that is running the Windows 11 operating system.
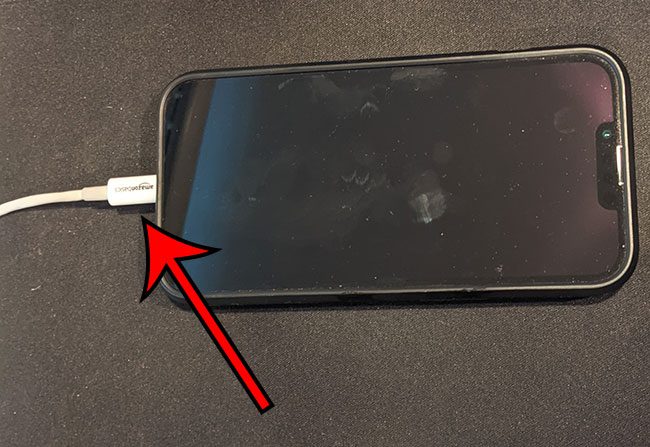
Step 1: Find your USB cable and connect the Lightning end of it to the iPhone, and the other end to a USB port on your computer.
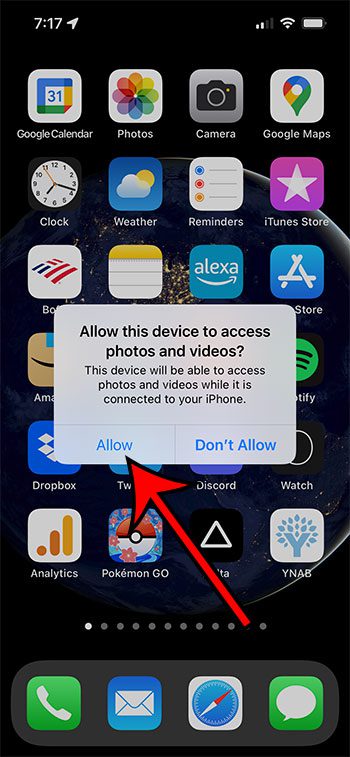
Step 2: Tap the Allow button that pops up on your screen after you connect the phone to the computer.
Step 3: Touch the Trust button at the center of the window, then enter your iPhone’s device passcode.
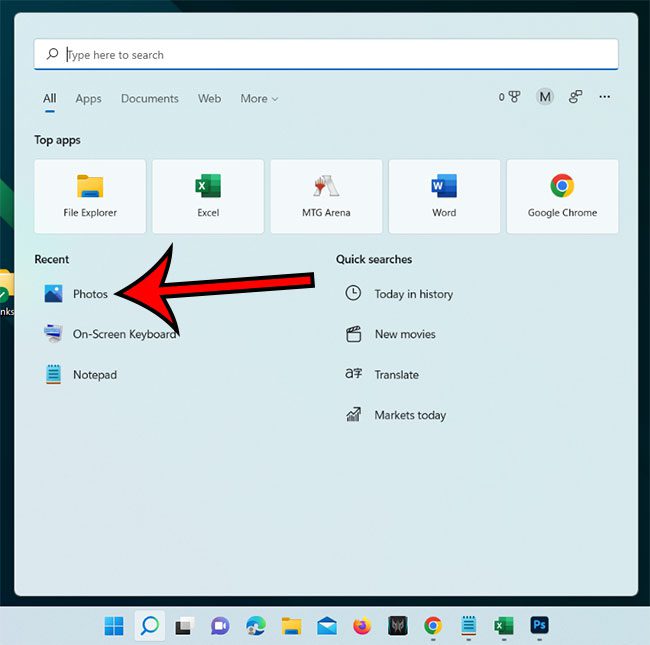
Step 4: Open the Photos app on your Windows PC.
You can just click the “Search” icon in the taskbar, then type the word “photos” into the search field and select the app.
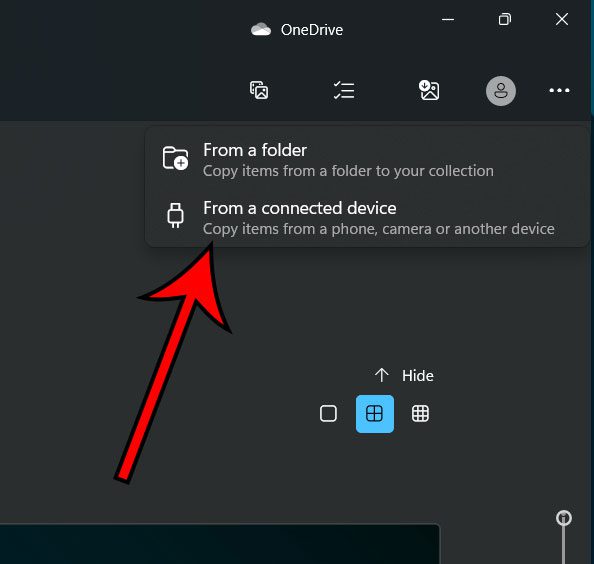
Step 5: Click the Import button at the top-right corner of the Photos window.
Step 6: Choose From Connected devices from the list of options.
Your computer will then spend a moment or two searching for connected devices and pictures on those devices. This may take a while depending on the speed of your computer and the number of pictures on your iPhone.
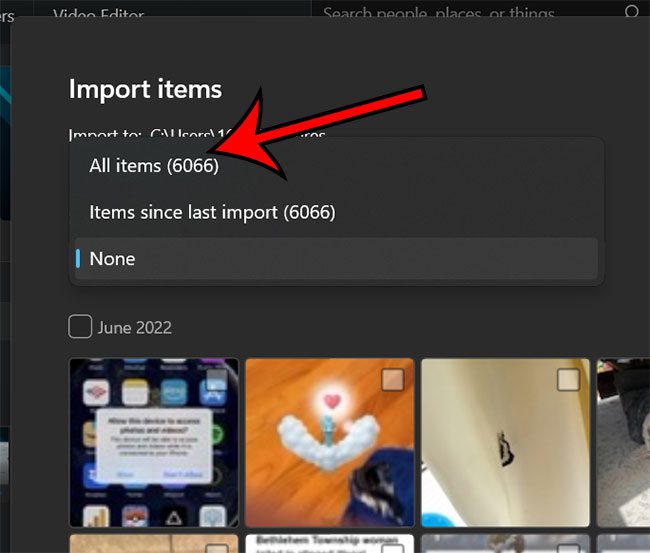
Step 7: Click the dropdown menu under the word Select, then choose the All Items option.
There is also an option on that menu to select all photos from the last import, which you can select next time to speed up the process.
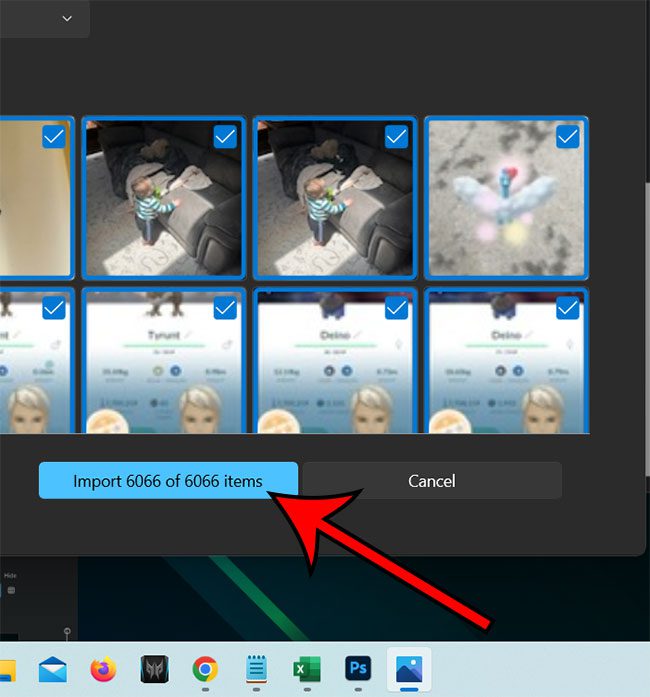
Step 8: Click the blue Import button at the bottom of the window to begin the process of importing the photos from your phone to your PC.
This can take a long time depending on the number of pictures that you are importing. You can click the search icon and type “photos”, then select it from the search results. It’s also possible that the Photos app will launch automatically once the phone is connected. Now that you know how to transfer iPhone photos to PC you will be able to do this whenever you start to notice that you are running our of storage space on your iPhone, or if it just feels like it’s been a while since you moved your pictures to your computer.
More Information on How to Offload iPhone Pictures to a Laptop or Desktop
If your camera gets a lot of use, then your Photos app might be taking up more space on your iPhone than almost anything else. As you transfer photos from iPhone to PC you are going to have the option of keeping them on the iPhone, or removing them after the transfer is complete. If you are running low on storage space, then electing to remove them could be a really simple way to free up some storage. If you also back up all your photos to iCloud, then you can also view iCloud Photos from your Web browser. You simply need to navigate to https://icloud.com in a Web browser like Chrome, Edge, or Firefox, then sign in to your iCloud account with your Apple ID and password. The Pictures folder on your Windows computer is a good place for you to transfer pictures from anywhere, not just your iPhone. When you have a File Explorer or Windows Explorer window open on your computer you are going to see a number of quick links in the column on the left side of the window. One of these will be “Pictures.” If you upload photos to this folder when transferring photos then you won’t need to worry about wasting time in the future trying to figure out the folder that you used to copy photos from your device, or trying to locate the download photos folder that you used in the Windows Photos app. If you open the Photos library on your iPhone you will be able to select photos from there and send them to people through text messages or emails. This can be a preferable way to move the files to a different location (such as emailing them to your own email address) if you are just trying to move a handful of images. If you delete some pictures and are trying to optimize iphone storage, don’t forget to go to the Recently Deleted folder in the Photos app and clear that out. You won’t free up your internal storage on Apple devices until the pictures are completely gone from the device, so the free storage that you see on the iPhone storage menu won’t update until those pictures are gone completely.
Additional Sources
After receiving his Bachelor’s and Master’s degrees in Computer Science he spent several years working in IT management for small businesses. However, he now works full time writing content online and creating websites. His main writing topics include iPhones, Microsoft Office, Google Apps, Android, and Photoshop, but he has also written about many other tech topics as well. Read his full bio here.
You may opt out at any time. Read our Privacy Policy