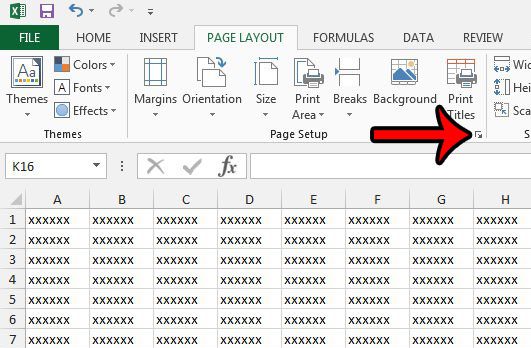
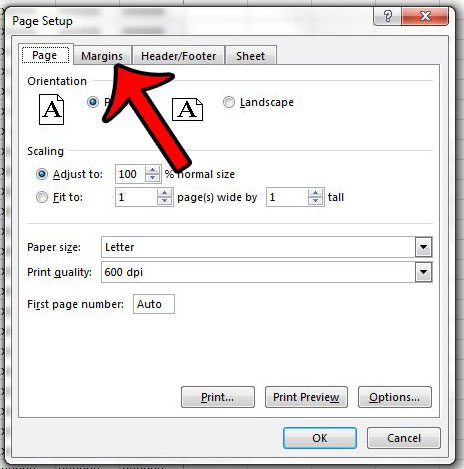
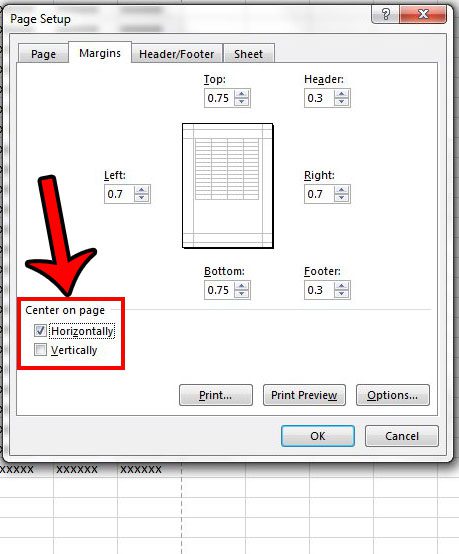
The setting for the printed page alignment in Excel is found on the Page Setup menu, under the Margins tab. Our tutorial below will direct you to that location so that you can elect to center the page either horizontally, vertically, or both.
How to Center Printed Pages in Excel 2013
The steps in this article will show you how to find the settings which control the alignment of your entire printed spreadsheet. There is a separate setting for the horizontal orientation, as well as the vertical orientation. Read more about ways to fix printing issues, such as getting your spreadsheet to fit to the page more easily, or clearing a print area. Step 1: Open your spreadsheet in Excel 2013. Step 2: Click the Page Layout tab at the top of the window. Step 3: Click the tiny Page Setup dialog launcher at the bottom-right corner of the Page Setup section in the ribbon. Step 4: Click the Margins tab at the top of the window. Step 5: Check the box to the left of Horizontally to center your printed spreadsheet horizontally on the page. Check the box to the left of Vertically to center it vertically on the page. If you then click the Print Preview button you can see how your printed spreadsheet will now look. If you find that your data is difficult to read because you can’t see the cell boundaries, then click here to learn how to print gridlines. Additionally, if you are printing a multi-page spreadsheet, then printing titles can make it easier for your readers to identify cell locations. After receiving his Bachelor’s and Master’s degrees in Computer Science he spent several years working in IT management for small businesses. However, he now works full time writing content online and creating websites. His main writing topics include iPhones, Microsoft Office, Google Apps, Android, and Photoshop, but he has also written about many other tech topics as well. Read his full bio here.
You may opt out at any time. Read our Privacy Policy


