Saving Microsoft Word Documents Correctly
To utilize the restore feature in Microsoft Word, you must save your document on Microsoft OneDrive. As a Microsoft 365 subscriber, you’ll have plenty of room as each account comes with 1TB of online storage. Microsoft Word automatically saves your document as changes get made. The key to using the restore tool is making sure you’re saving a Microsoft Word document properly. At the heart of this is the AutoSave feature, which saves your documents in real-time to Microsoft OneDrive.
Automatically Save Word Files to OneDrive
To set up AutoSave in Microsoft Word:
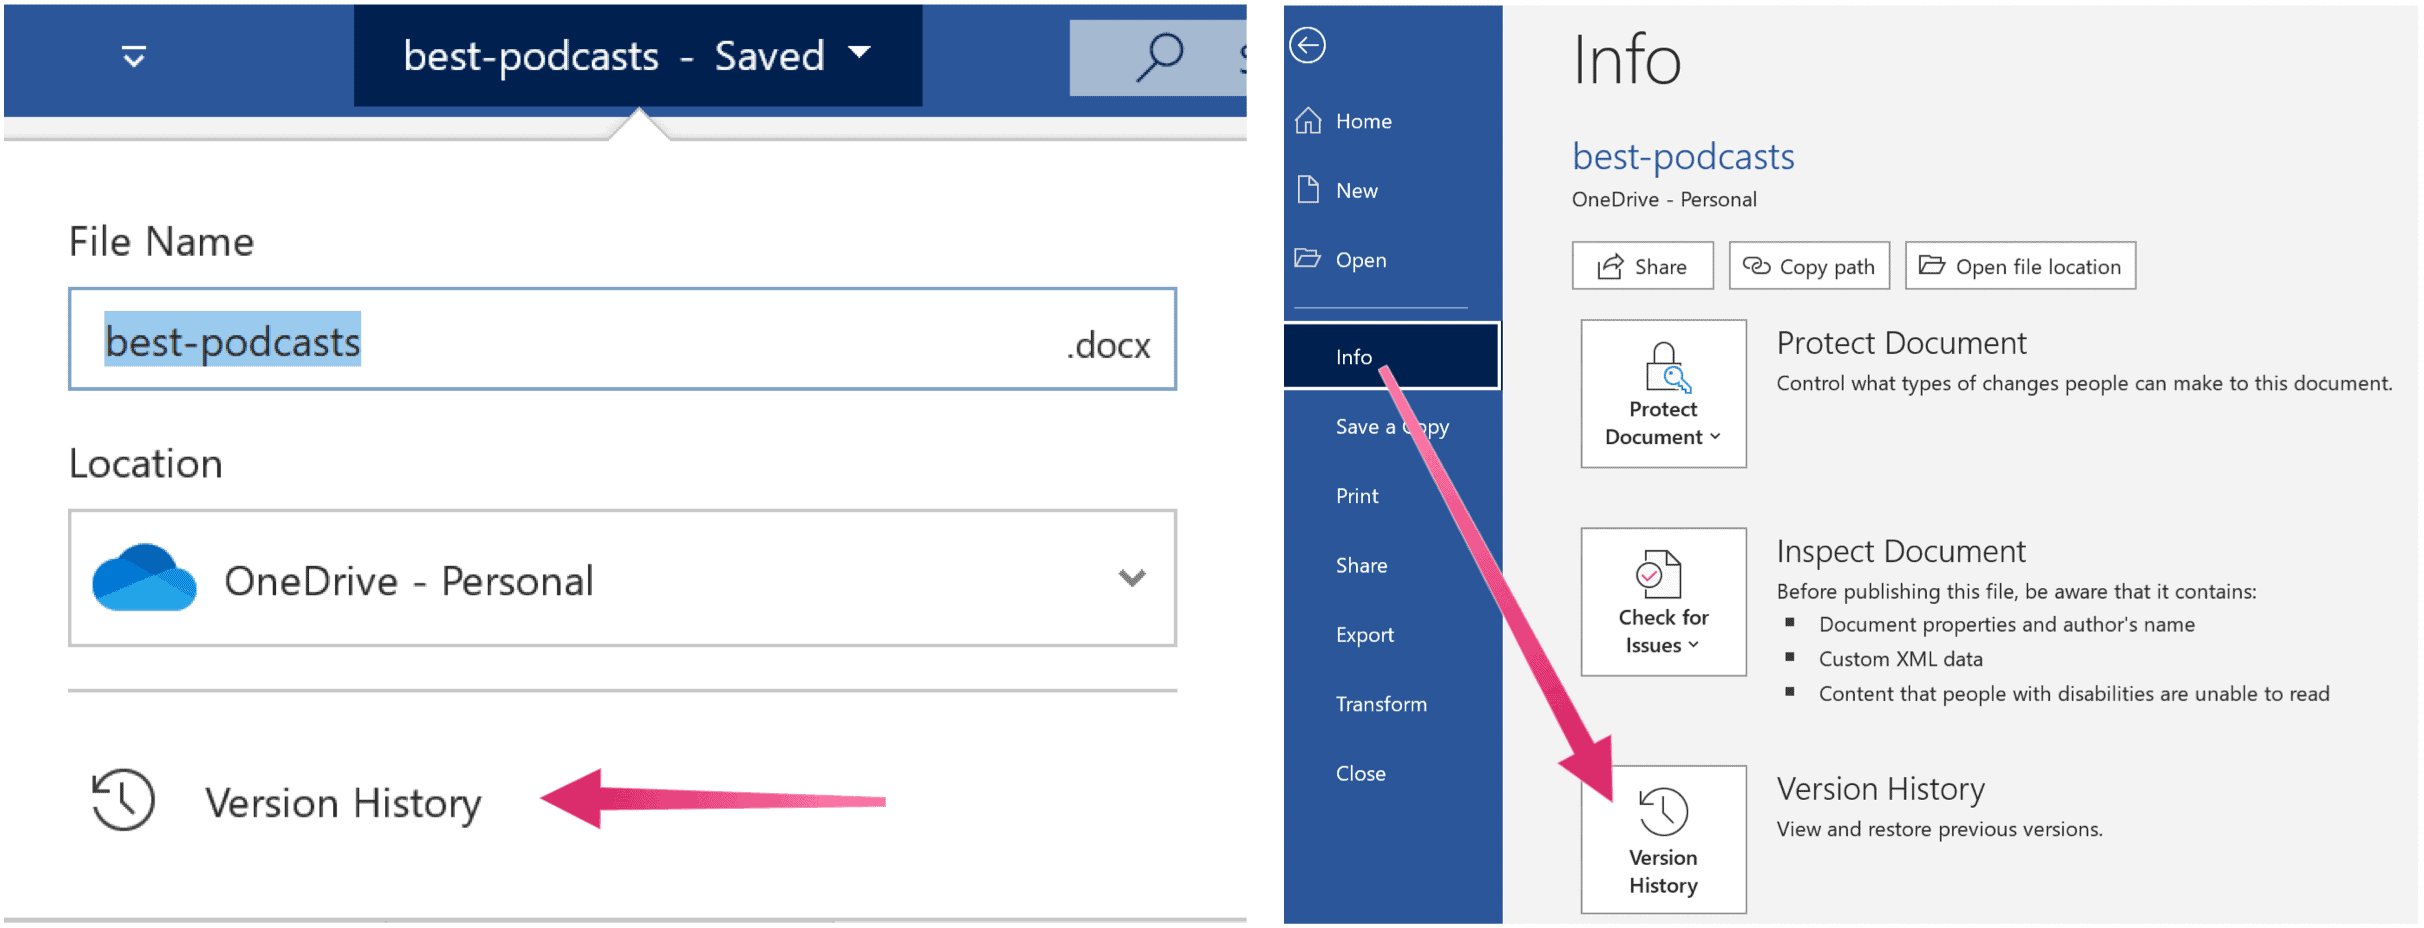
Restore Previous Versions of Microsoft Word Documents
Open up the document you wish to restore. Follow the directions below. Alternatively, you can:
Regardless, you’ll now see a listing of restored versions of your document on the right side of Microsoft Word. Each item is organized by date, with the newer versions at the top of the list. Next, click to open a previous version. Further, older documents have a save date and time next to the document name above.
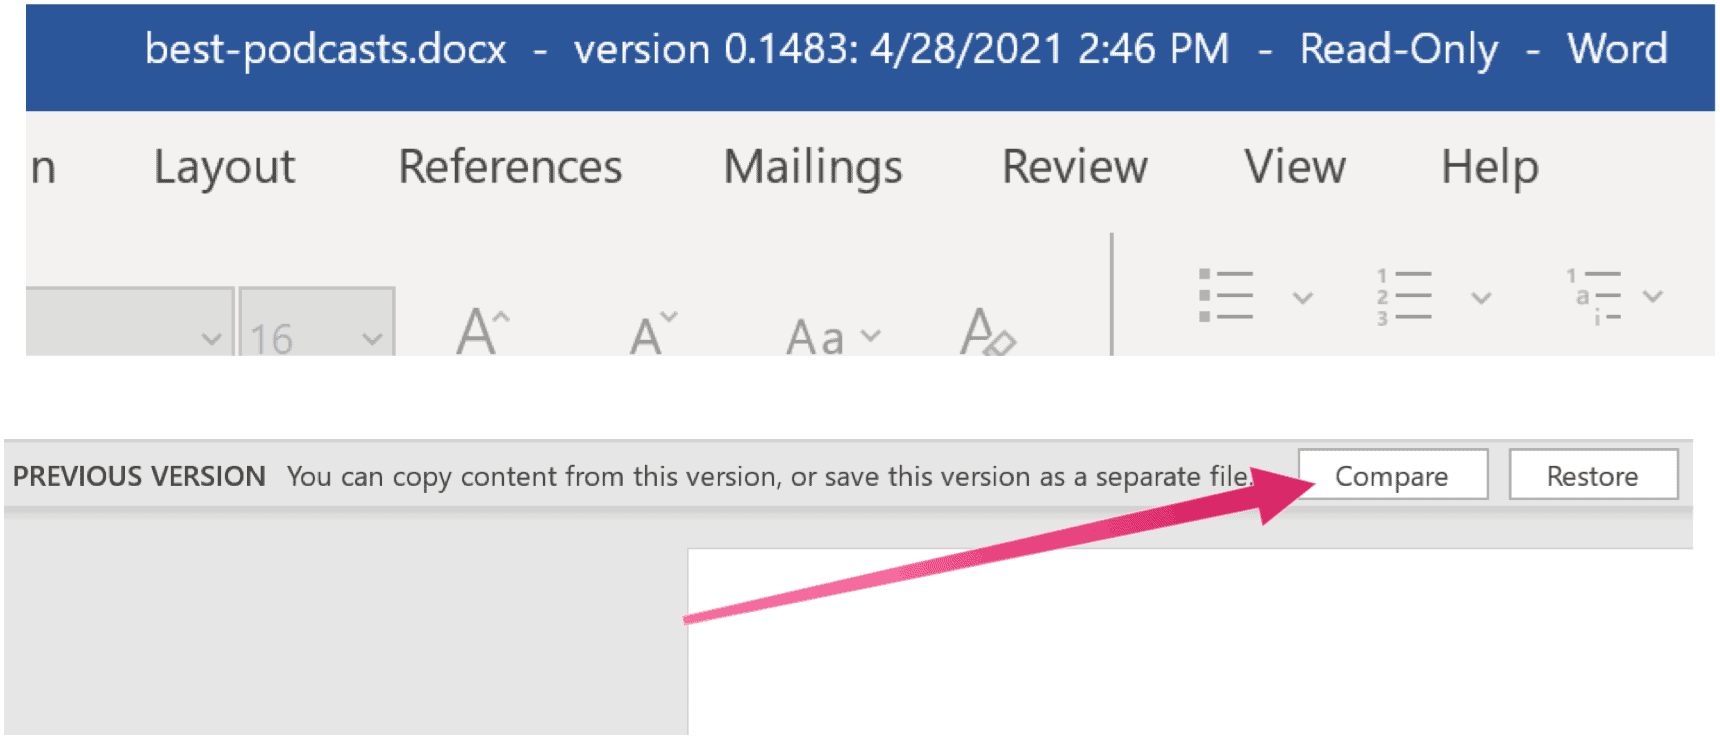
Comparing Versions
You can compare the current version of your document with the recently opened previous version. To do so, click the Compare button underneath the Ribbon in the older version.
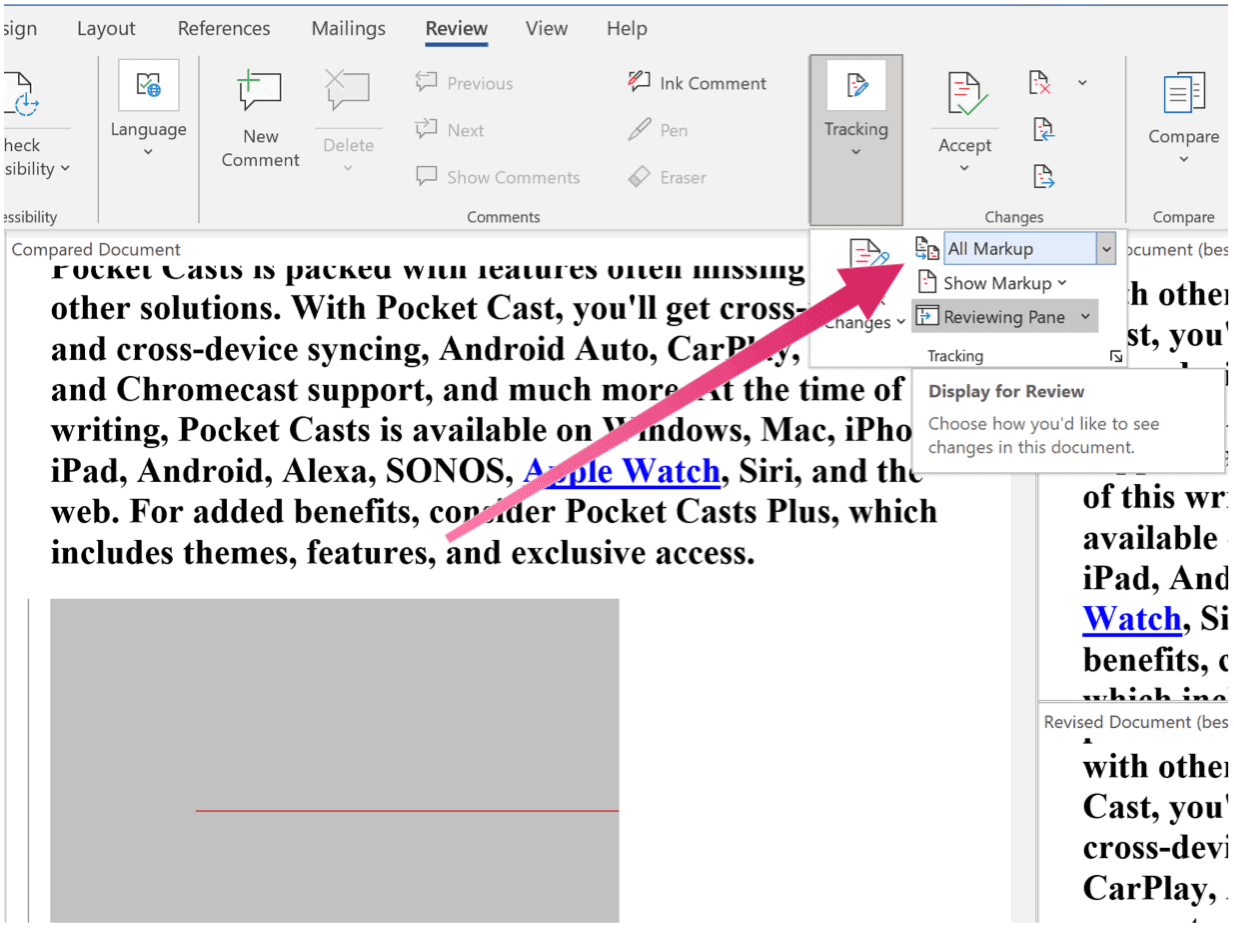
At the top left, you’ll see a list of the revisions between the original and recovered version. Shown in separate sections are insertions, deletions, moves, formatting, and comments. Additionally, vertical lines next to paragraphs in the middle column denote changes. At the far right are two boxes. One shows the original document, the other the restored document.
Markup
To dig even further, click on the Tracking section of the Review tab—select Simple Markup, followed by All Markup. Removed items are highlighted with red font and a strikethrough. Meanwhile, additions are also colored in red and underlined. After reviewing these changes, you can save the restored file as a separate document. To do so, save just as you would any other Word document.
Restoring
To completely replace the original version of your document with the restored version: That’s it; a previous version of your document is now the current version. Further, you can always go back by following these instructions since versions are continuously saved thanks to Microsoft 365 and OneDrive. There’s much you can do with Microsoft Word. The most recent articles covered how to combine document revisions, sort Word lists alphabetically and viewing multiple pages. Many more are also available online. You can find Microsoft Word inside the Microsoft 365 suite. For home use, the Microsoft 365 suite is currently available in three varieties, including a Family, Personal, and Home & Student plan. Price-wise, the first is $100 per year (or $10/month) and includes Word, Excel, PowerPoint, OneNote, and Outlook for Mac. Membership covers up to six users. The Personal version is for one individual and is $70/year or $6.99 per month. Finally, the student plan is a one-time purchase of $150 and includes Word, Excel, and PowerPoint. Business users can select from Basic, Standard, and Premium plans, starting at $5 per user/month. Comment Name * Email *
Δ Save my name and email and send me emails as new comments are made to this post.


![]()
