It’s possible that you have already explored the different tabs in the navigational ribbon at the top of the Word window and discovered various things like the WordArt tools that the application offers for customizing the appearance of the text on the page. But you might be unclear on which of these tools to utilize if you simply want to apply a colorful border to some of the text in your document. Our guide below will show you how to use Word’s Outline effect to modify the appearance of the text in your document. You can even adjust the thickness and style of the outline effect if you are trying to achieve a particular appearance.
How to Add an Outline to Text in Word 2013
Our tutorial continues below with additional information on outlining fonts in Microsoft Word 2013, including pictures of these steps. There are some good places for you to get free fonts, which can be useful when you are trying to add cursive fonts to Word.
How to Make Outline Text in Word 2013 (Guide with Pictures)
The steps in this article are going to show you how to use the Outline font effect in Word 2013. This adds color to the selected text in your document. The effect is similar to what your text would look like if you just changed the color. However, it does make the text appear thicker. The effect becomes considerably more noticeable as the font size increases.
Step 1: Open your document in Word 2013.
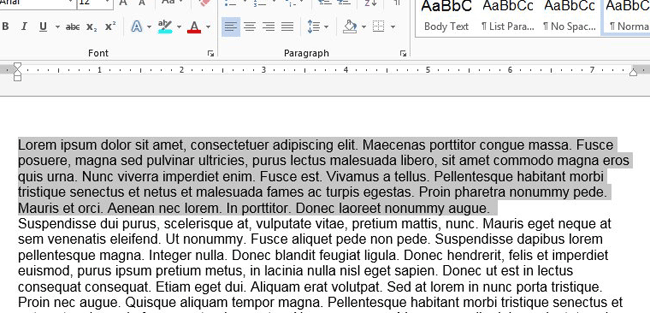
Step 2: Select the text to which you wish to apply the outline effect.
Note that you can select all of the text in the document by clicking somewhere inside the document, then pressing Ctrl + A on your keyboard.
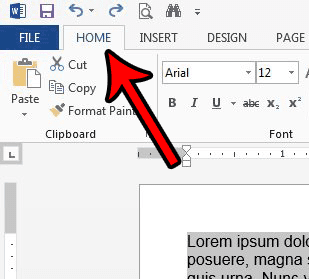
Step 3: Click the Home tab at the top of the window.
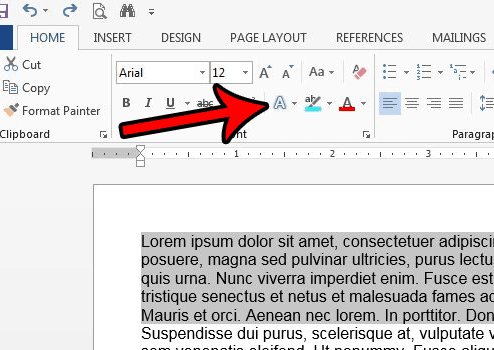
Step 4: Click the Text Effects and Typography button in the Font group of the ribbon.
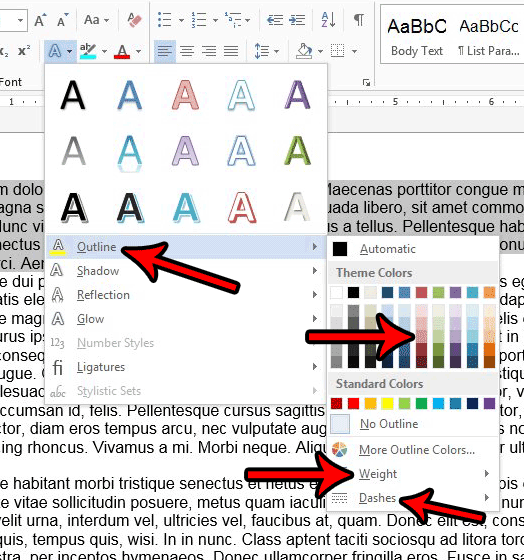
Step 5: Select the Outline option, then choose the desired color for the text outline.
If you wish, you can also click the Weight option to make the border thicker or thinner. You can also select the Dashes option if you want to change the style of the outline. Our tutorial continues below with additional discussion on outlining text in Word documents.
Can I Remove an Outline from Text in a Microsoft Word Document?
When you do something to text in a Microsoft Office file, such as using an option on the Format tab or when you click Shape Outline after selecting some of the text in the document, then you are applying a formatting option to that content. Almost any change that you make to something in your document is reversible, it’s typically just a matter of figuring out what’s happened. If you want to remove an outline color from some of the words in your document you simply need to select the words or letters containing the outline color that you want to remove. You can then select the Home tab at the top of the window, click the Text Effects and Typography button, choose the Outline option, then click the No Outline button that appears below the color picker.
More Information on How to Outline Font in Word 2013
The steps above have hopefully provided you with useful instructions as to how you can apply an outlining effect to some of the text in your Microsoft Word document. After you click the Text Effects and Typography button you are going to see a number of different options on the drop down menu that appears. This includes about 15 style options at the top of the menu, as well as a list of options including:
OutlineShadowReflectionGlowNumber StylesLigaturesStylistic Sets
You can give yourself a little more freedom when working in a Microsoft Word document if you elect to use a text box. You can find this by selecting the Insert tab at the top of the window, then clicking the Text Box button and choosing the style of text box that you want to use. You can then add content inside of that text box and apply different formats like text fill, or any of the options in the WordArt Styles group, and use those options to customize the appearance of that text without affecting any of the other things in the regular body of the document. Are you working with pictures in your Word document, and there’s a border around a picture that you want to get rid of? Learn how to remove borders from pictures in Word 2013 so that picture is displayed borderless in the document.
Additional Sources
After receiving his Bachelor’s and Master’s degrees in Computer Science he spent several years working in IT management for small businesses. However, he now works full time writing content online and creating websites. His main writing topics include iPhones, Microsoft Office, Google Apps, Android, and Photoshop, but he has also written about many other tech topics as well. Read his full bio here.
You may opt out at any time. Read our Privacy Policy


