One particular aspect of placing objects on top of one another is that you can use it to customize your images. Our tutorial below will show you how to change a PowerPoint image’s transparency if you want to put something on top of or beneath that image on the slide.
How to Make an Image More or Less Transparent in Powerpoint 2013
Our article continues below with additional information on adjusting picture transparency in Powerpoint 2013, including pictures of these steps. Image editing applications like Adobe Photoshop have long provided tools that can assist you with making a picture transparent. But tools like Photoshop can be expensive and difficult to use, so you may be looking for a simpler way to adjust a picture format in Powerpoint 2013. Powerpoint 2013 pictures that you insert via the Insert tab can be formatted in a couple of different ways, but you might be frustrated if you attempt to make the picture transparent. Luckily you can add a transparent picture to your presentation, although you will need to approach it in a slightly different way. To make a picture transparent in Powerpoint 2013, you will first need to add a shape to your slide, then fill that shape with an image. You can then adjust the transparency of this object, allowing you to achieve the desired look for your slideshow. If you also use Google Slides to create presentations, then you can also find out how to adjust transparency in Google Slides.
How to Add Transparent Images in Powerpoint 2013 (Guide with Pictures)
The steps below are going to show you how to create a shape in a Powerpoint presentation, fill that shape with a picture that you have saved to your computer, then adjust the transparency of the entire image. This article will assume that your picture is rectangular in size and that you want to make the entire picture transparent.
Step 1: Open the presentation to which you wish to add a transparent picture.
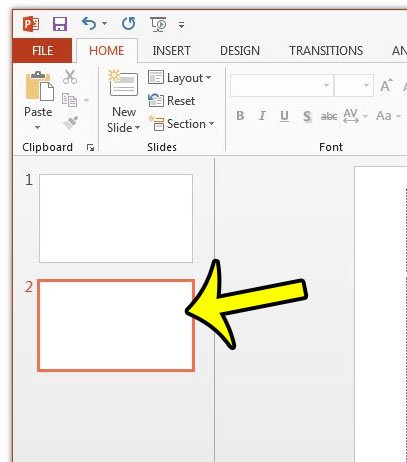
Step 2: Select the slide in which you wish to add the transparent picture.
I am adding the picture to slide 2 in the image below.
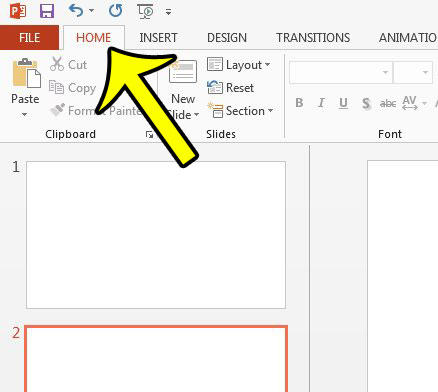
Step 3: Click the Home tab at the top of the window.
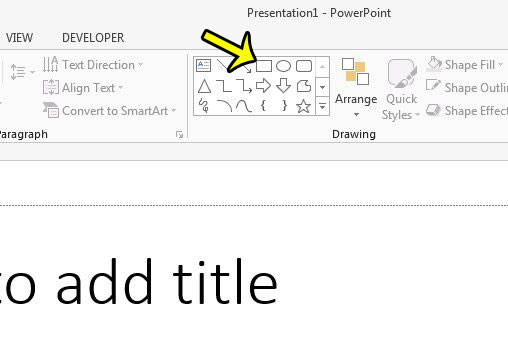
Step 4: Click the rectangle shape in the Drawing section of the ribbon.
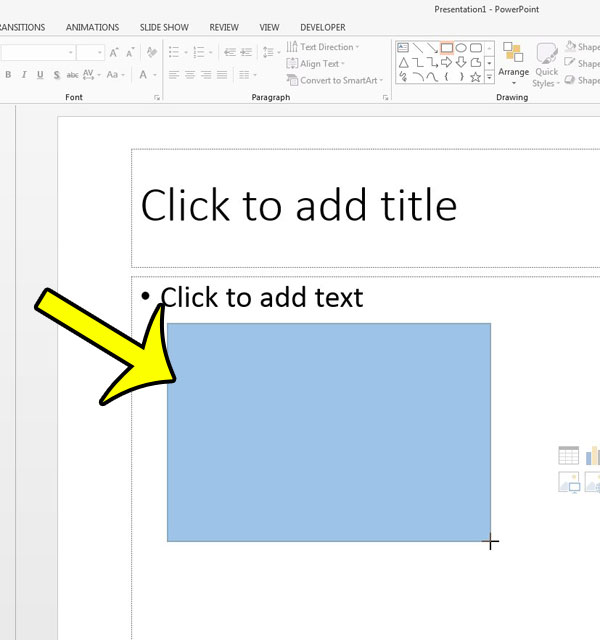
Step 5: Click at the point in the slide where you wish to add the picture, then drag the rectangle until it is the approximate size that you wish to use for the picture.
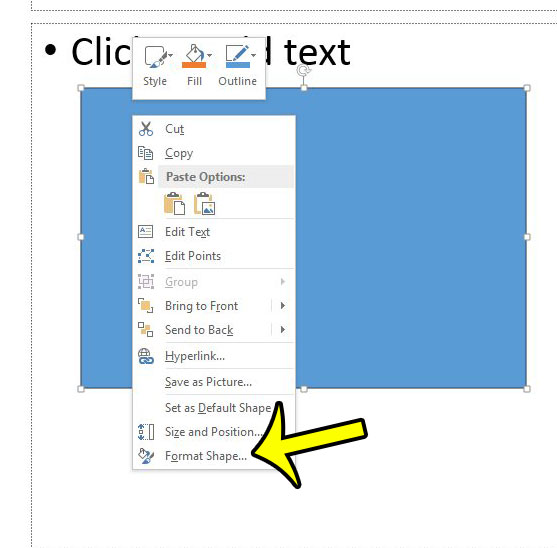
Step 6: Right-click the shape, then click the Format Shape option. This will open a new column at the right side of the window.
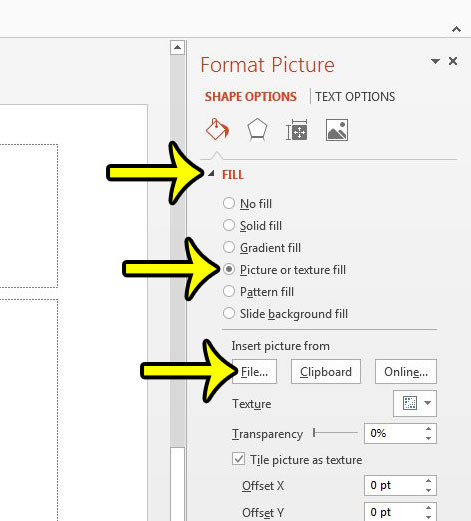
Step 7: Click the arrow to the left of Fill to expand the menu, check the option to the left of Picture or texture fill, then click the File button to locate the picture on your computer.
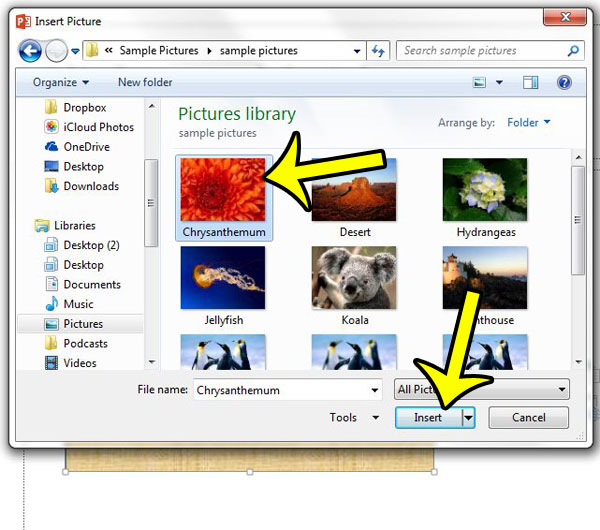
Step 8: Find the picture that you want to use, then click the Insert button.
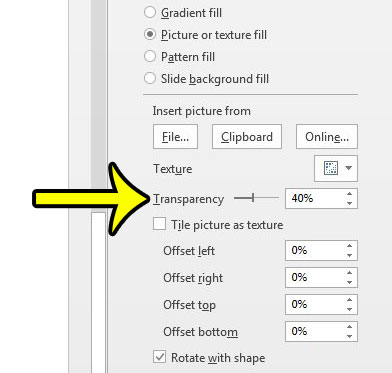
Step 9: Adjust the Transparency slider in the Format Shape column at the right side of the window until you have reached your desired level of transparency.
Are the pictures in your presentation making the file too large for email? Learn about compressing images in Powerpoint 2013 to help lower the file size of your Powerpoint presentation.
More Information on How to Make a Picture Transparent in Powerpoint 2013
When you adjust the transparency of an image in Powerpoint, that adjustment is not part of the image itself. If you were to copy and paste that image to another document, such as a Microsoft Word document, then the image transparency would not copy with it. Additionally, if you save the image as a picture file, it will not include the transparency adjustment. Newer versions of Microsoft Powerpoint, such as Powerpoint 2016 and Powerpoint for Office 365, also have this option for changing picture transparency. Fortunately, however, it’s a little easier to make pictures transparent in those applications. Simply right-click on the image, then choose the Format Picture option. You can then select the Picture button at the top of the Format Picture column, then expand the Picture Transparency section and drag the Transparency slider. If you add a picture to a Powerpoint slide from the Insert menu you can click on that picture, which will cause a Picture Format tab to appear at the top of the window. If you select that tab you will see a number of different options that let you change your picture’s format, or apply various effects to that picture.
He specializes in writing content about iPhones, Android devices, Microsoft Office, and many other popular applications and devices. Read his full bio here.
