Footnotes appear at the bottom of each page in your document, while endnotes appear at the end of your document. Here’s how to insert them in Microsoft Word.
Inserting Footnotes in Microsoft Word
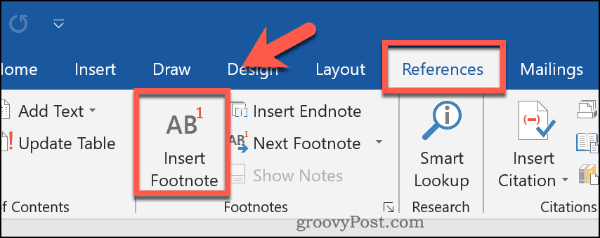
Word has offered the ability to add footnotes and endnotes to Word documents for many years, so these instructions should work in all modern software versions. To add a footnote in Word, open your document and place your blinking cursor at a point within your document. If you’re citing another publication, this would usually be at the end of a sentence. This position becomes the reference point for your footnote. To add the footnote, click References > Insert Footnote from the ribbon bar.
The footnote will be inserted at this point. A small superscript number will be placed at the reference point, matching the number in the section just above the page footer.
Each of the added footnotes will appear at the end of each page, but the reference numbers will be used sequentially throughout your entire document. You can add the note or cited reference here for you to refer back to.
You can also hover over the reference number in your document to quickly view the footnote attached to it.
To cycle through all of your footnotes in turn, click References > Next Footnote.
Inserting Endnotes in Microsoft Word
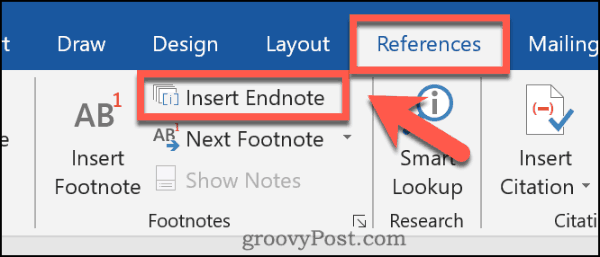
If you don’t want to clutter each page with footnotes, you could use endnotes instead. These work in a similar way, with a superscript reference point inserted at points in your document. Unlike footnotes, endnotes only appear at the end of a section or the end of your document if you aren’t using section breaks. To insert them, open your document and place your blinking cursor at an appropriate place. When you’re ready, click References > Insert Endnote to insert the endnote.
Like footnotes, a superscript number or letter will appear next to your reference point once inserted. This will match the number or letter shown in your endnotes.
You can add a note or cite reference next to the matching number or letter in the endnotes section. These numbers or letters will proceed sequentially throughout your document.
You can also hover over the reference point to quickly view the note or citation attached to your endnote.
To go through each of your endnotes, click the arrow button next to the Next Footnotes button in the References > Footnotes section. From here, click Next Endnote.
How to Customize Footnotes and Endnotes
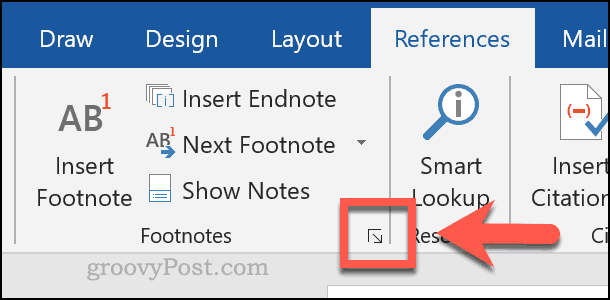
You can customize how your footnotes and endnotes appear in Word. It’s possible to change the superscript references to numbers, letters, or symbols. You can also set where the footnotes or endnotes appear on your document. To do this, click References and click the arrow icon in the bottom-right corner of the Footnotes section.
Press the radio button for either Footnotes or Endnotes at the top of the Footnote and Endnote settings box. This will allow you to begin changing the appropriate settings for each feature.
Select an option from the Number Format drop-down menu to change the superscript references to numbers, letters, or symbols.
You can use a custom symbol for your footnotes or endnotes by clicking the Symbol button next to the Custom mark box.
If you’d prefer to start your footnotes or endnotes at a custom point, select your chosen letter or number from the Start at box.
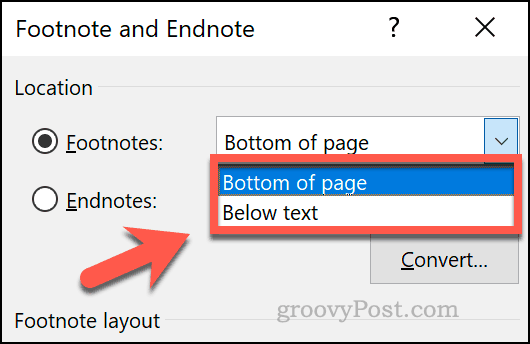
If you would rather have footnotes appear below your inserted text, rather than at the end of the page, choose Footnotes, then select Bottom of page or Below text from the drop-down menu.
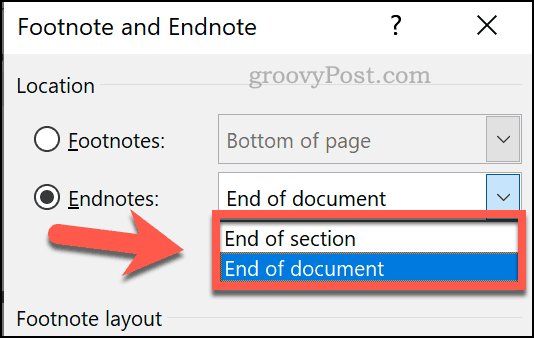
If you want to set endnotes to appear at the bottom of a section, rather than the bottom of the document, choose Endnotes, then select End of section or End of document from the drop-down menu.
Click Apply to apply the changes you’ve made to your document.
Using Word Effectively
Using footnotes and endnotes is just one way to build effective skills using Microsoft Word. If you’re writing a large document, you can track your changes in Word to let you switch between versions easily. If you’re worried about copyright or want to make different versions of your documents clear, you can also add a watermark to the Word documents you create.
![]()

