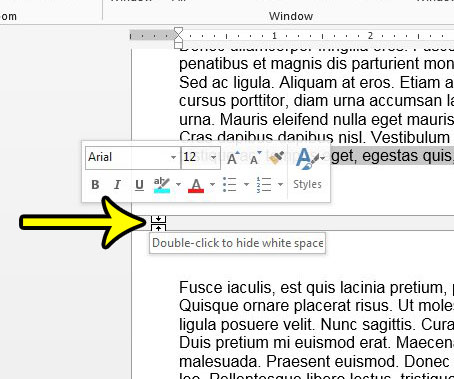
Fortunately this is something that you can adjust in a couple of different ways. Our tutorial below will show you how to do it through the Word Options menu then, at the bottom of the article, we will show you a quick way to do it by double-clicking between your pages.
How to Change the Display of Pages in Print Layout in Word 2013
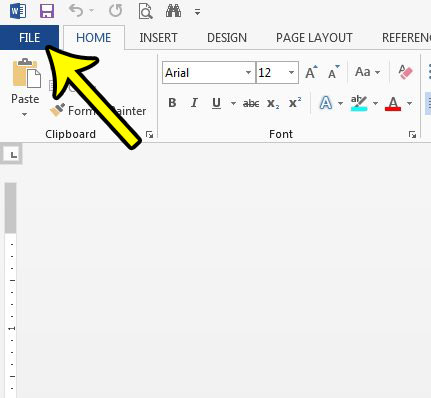
The steps in this article are going to change a setting on the Word Options menu so that there is no white space between your document’s page when you are in Print Layout mode in Microsoft Word 2013. If you like to think of your document more as one singular, cohesive unit and are not very concerned with page length, then this change can be helpful. Note that this only affects the Print Layout view. You can switch to this view by clicking the View tab at the top of the window, then clicking the Print Layout option. Step 1: Open your document in Word 2013. Step 2: Click the File tab at the top-left corner of the window.
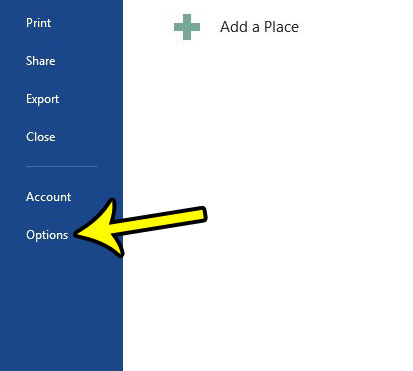
Step 3: Click the Options button at the bottom of the column on the left side of the window.
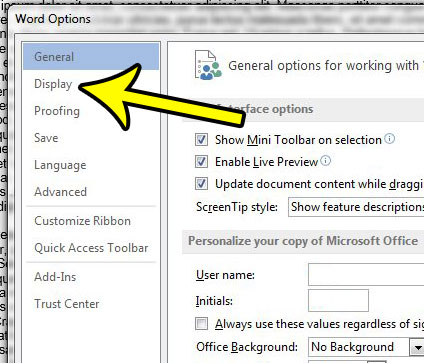
Step 4: Click the Display tab at the left side of the Word Options window.
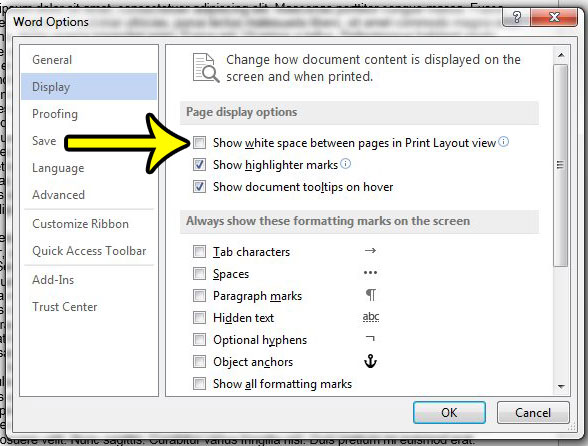
Step 5: Uncheck the box to the left of Show white space between pages in Print Layout view.
Step 6: Click the OK button at the bottom of the window to apply your changes. Note that you can also hide this white space by positioning your mouse cursor between two pages and double-clicking as well.
Does your document need a background image, but you aren’t sure how to place one? Learn how to add a background picture in Word 2013 and even use a custom picture that you took yourself, or downloaded from the Internet. He specializes in writing content about iPhones, Android devices, Microsoft Office, and many other popular applications and devices. Read his full bio here.
