Change the Windows 11 Lock Screen Wallpaper
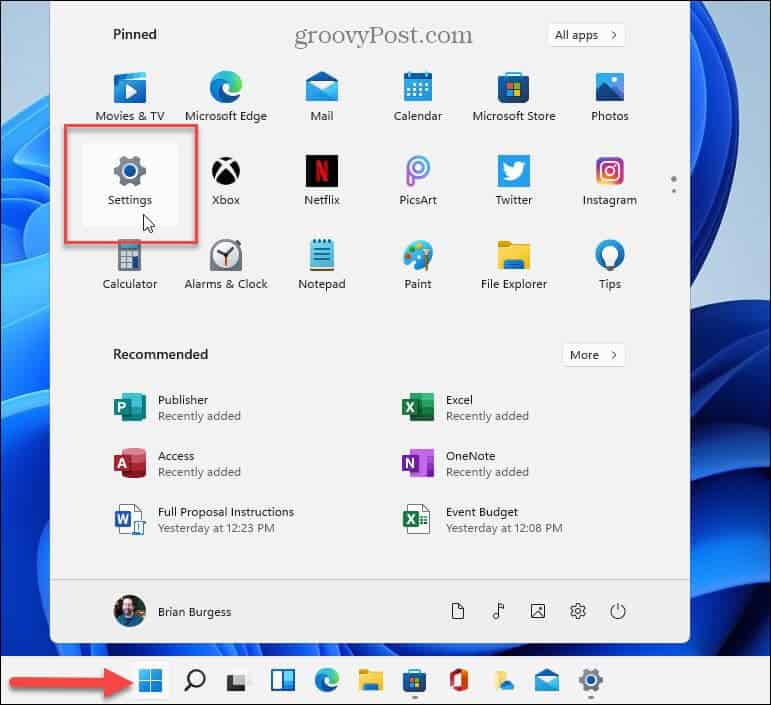
To change the lock screen wallpaper, click the Start button and then click on the Settings icon. Alternately, you can use the keyboard shortcut Windows key + I to open Settings directly.
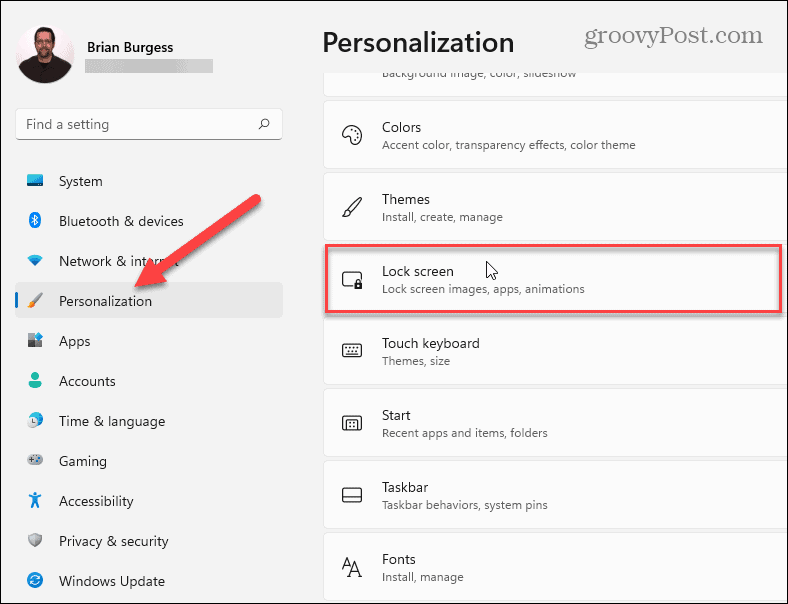
When Settings launches, click on Personalization from the list on the left. And then, click the Lock Screen button from the menu on the right under the “Personalization” section.
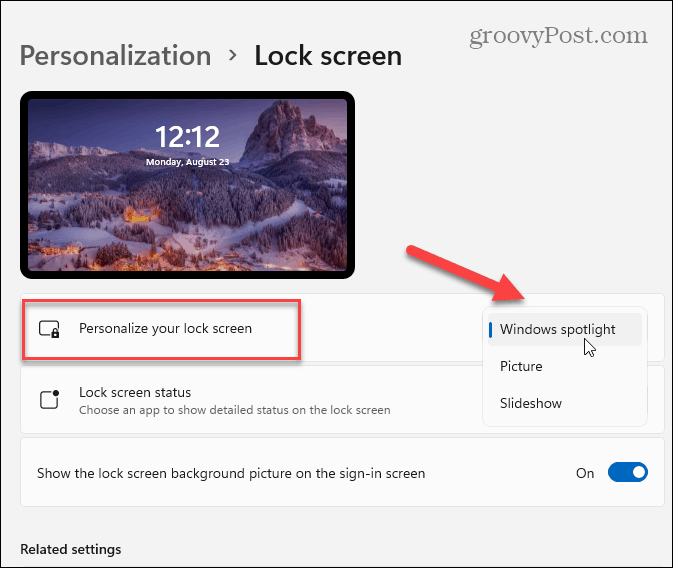
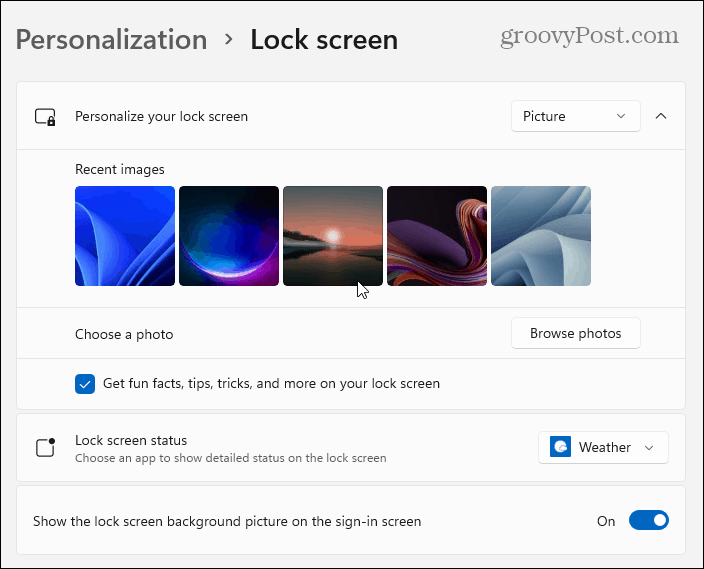
Now, under the Personalize > Lock screen section, click the dropdown menu in the “Personalize your lock screen” section. There you have three options.
Windows Spotlight: Images are set automatically by Windows.Picture: This allows you to choose an image from Microsoft or a photo from your collection. You just need to browse to it and set it as the lock screen wallpaper.Slideshow: This lets you select a folder with photos and other images in it, and they will rotate through at regular intervals.
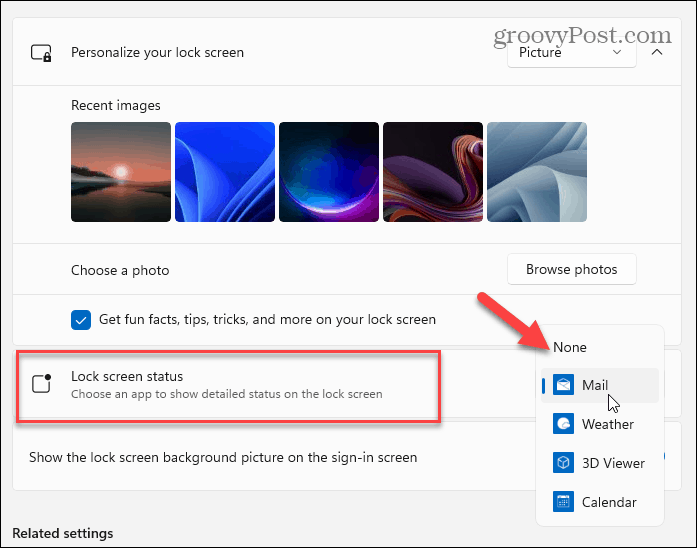
Once you have the image you want to use for the lock screen selected, you might want to change which apps show notifications. To do that, click the menu next to “Lock screen status” and select an app. Note that you can choose none if you don’t want anything to display.
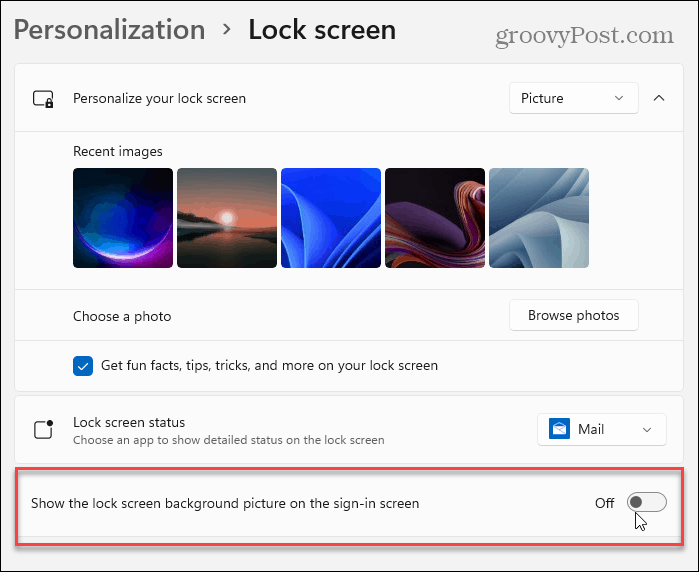
When you hit Enter on the keyboard, click the mouse, or swipe up on a touchscreen device – it goes to the login screen. When you set the Lock Screen wallpaper, it will change for the login screen too. But you can disable it. While you’re in the Personalize > Lock screen section, turn off the “Show the lock screen background picture on the sign-in screen” button.
That’s all there is to it. For more on customizing the look of the OS, check out our article on changing the desktop wallpaper. And for Windows 10 users, read about turning off lock screen ads. Comment Name * Email *
Δ Save my name and email and send me emails as new comments are made to this post.
![]()
