Our tutorial below will show you which settings you need to adjust in order to modify the number of preview lines. You can elect to display anywhere between zero and three lines of preview text, and you can specify the number of preview lines either individually for each folder, or for all of your folders at once.
Select the Number of Message Preview Lines in Outlook 2013
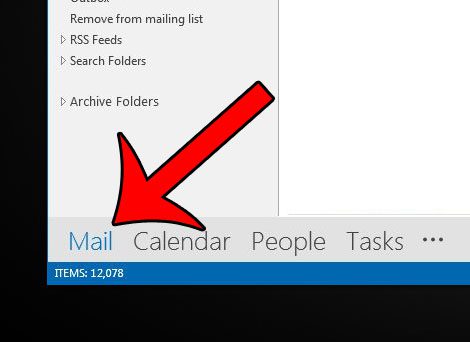
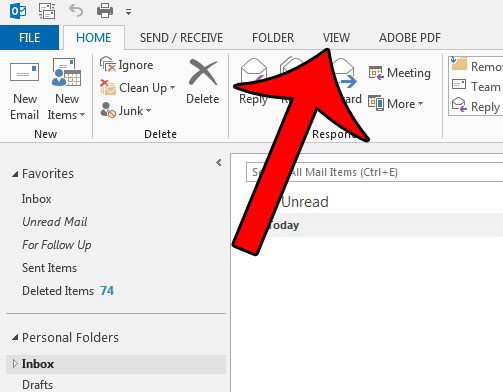
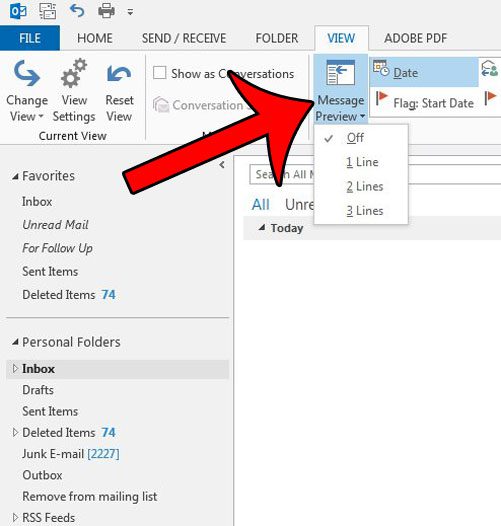
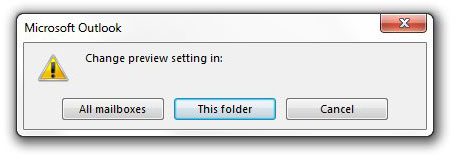
The steps in this article will adjust the number of lines of your emails that are shown by the Message Preview feature. This refers to the panel in Outlook 2013 that lists the emails in the currently active folder. These settings can be applied to either every folder at the same time, or individually by each folder. You can select which option you prefer in the last step of the tutorial below. Step 1: Open Microsoft Outlook 2013. Step 2: Click the Mail option at the bottom-left corner of the window. Step 3: Click the View tab at the top of the window. Step 4: Click the Message Preview button in the Arrangement section of the Office ribbon, then select the number of lines that you want to show via the Message Preview. Note that more messages will be shown in the window if the number of preview lines is smaller. Step 5: Select whether you wish to apply the preview setting for All mailboxes, or just This folder. Do you have an email in Outlook 2013 that you want to send at a later time or date? This tutorial will show you how to start using this feature.
See also
How to disable work offline in OutlookHow to strikethrough in OutlookHow to create a Vcard in OutlookHow to view the blocked sender list in OutlookHow to set up Gmail in Outlook
After receiving his Bachelor’s and Master’s degrees in Computer Science he spent several years working in IT management for small businesses. However, he now works full time writing content online and creating websites. His main writing topics include iPhones, Microsoft Office, Google Apps, Android, and Photoshop, but he has also written about many other tech topics as well. Read his full bio here.


