if you buy the same types of cameras, however, then you will need some way to identify them easily. This device allows you to watch streaming video from the camera, record movement, and adjust a number of different settings so that you can create the recording environment that you need. But when you start adding more and more cameras, it will become important to label them so that you can easily switch between the correct cameras. Our tutorial below will show you how to change the name of a camera in the iPhone’s Cloud Cam app. The steps in this article were performed on an iPhone 7 Plus in iOS 12.2. This guide assumes that you have downloaded and configured the Cloud Cam app on your iPhone.
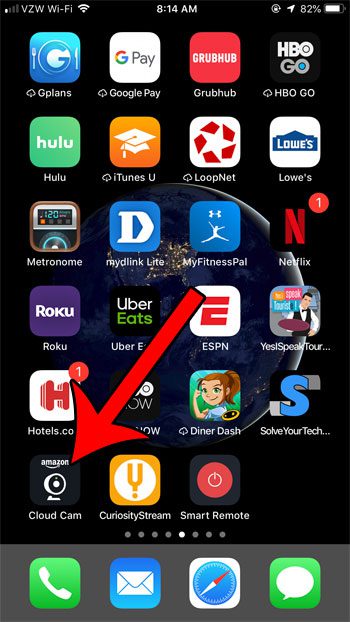
Step 1: Open the Cloud Cam app.
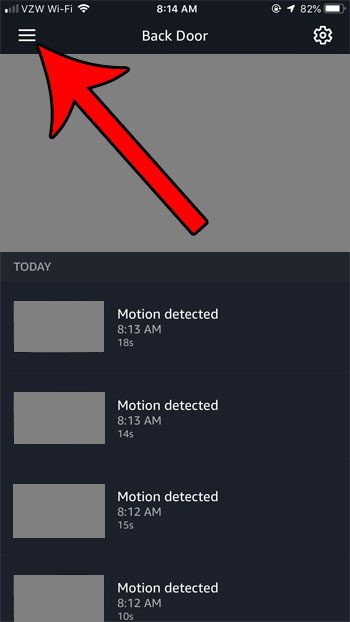
Step 2: Tap the menu button (the one with three lines) at the top-left of the screen.
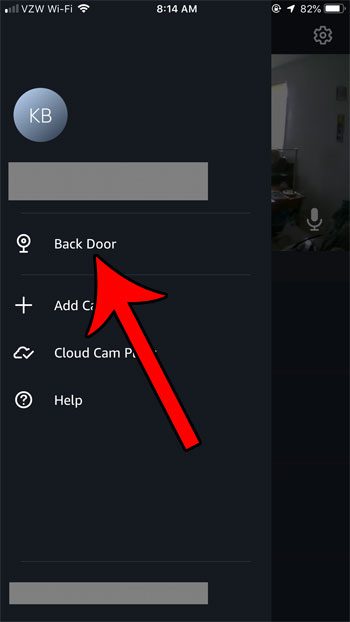
Step 3: Select the camera that you wish to rename.
This will make it the active camera in the app.
Step 4: Touch the gear icon at the top-right of the screen.
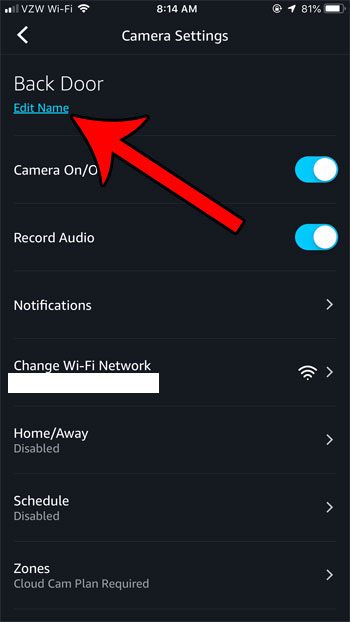
Step 5: Choose the Edit Name option under the current camera name.
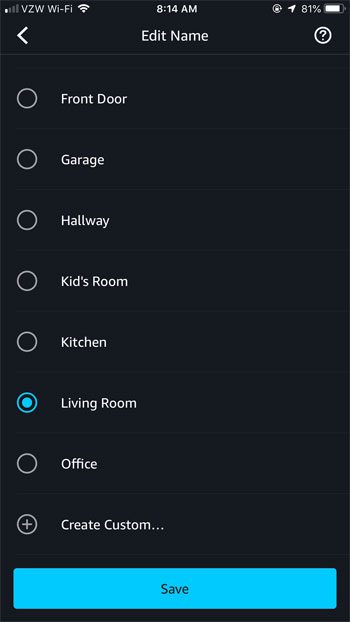
Step 6: Tap the circle to the left of the name you wish to assign.
You can also choose the Custom Name option at the bottom of the menu and assign your own name if the one you want isn’t listed. Once you’re done, touch the Save button. Running out of space on your iPhone? Find out how to clear up space on the device by deleting different files and apps that you don’t need anymore.
Additional Sources
After receiving his Bachelor’s and Master’s degrees in Computer Science he spent several years working in IT management for small businesses. However, he now works full time writing content online and creating websites. His main writing topics include iPhones, Microsoft Office, Google Apps, Android, and Photoshop, but he has also written about many other tech topics as well. Read his full bio here.
You may opt out at any time. Read our Privacy Policy
