Or perhaps you want to use a different color, or change the color that some else applied to your Excel spreadsheet. Luckily there is a way to change border color Excel selections so that you can switch to something different than what is currently being used in your worksheet.
How to Switch Border Color Excel Settings
Our guide continues below with additional information on changing border color Excel options, including pictures of these steps. Did you know that you can fill your cells with color to make them easier to identify? Our how to fill a cell with color in Excel tutorial will show you how. Organizing and sorting data in Microsoft Excel is a crucial element of creating a spreadsheet that is easy to read and understand. Using borders to separate data is a great way to do this, but you can run into organizational issues when you add borders of the same color to multiple sections of your document. Fortunately, you can change your border colors in Excel 2013 to more easily distinguish between different sets of data and help your readers better understand the information that they are viewing. Find out how to convert mm to inches in Excel with our guide that shows you how to use a formula for that purpose.
How to Color a Cell Border in Excel 2013 (Guide with Pictures)
There is a difference between the gridlines that are on your spreadsheet by default, and cell borders that you add to the spreadsheet. The steps in this article will show you how to add borders to a selected group of cells, then change the color of those borders. These colored borders will appear when you go to print your spreadsheet. If you are simply looking to print your spreadsheet’s gridlines, you can read this article.
Step 1: Open your spreadsheet in Excel 2013.
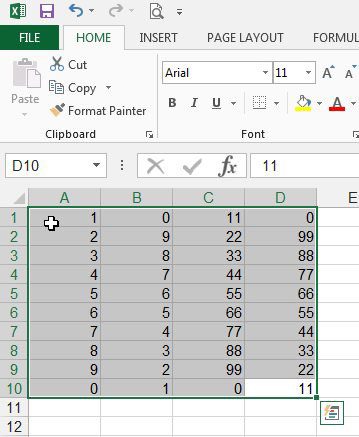
Step 2: Highlight the cells to which you want to add your borders.
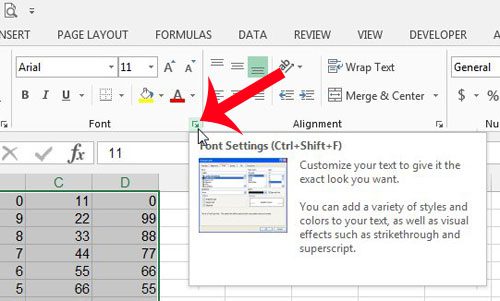
Step 3: Click the Home tab at the top of the window.
Step 4: Click the Font Settings button at the bottom-right corner of the Font section of the navigational ribbon.
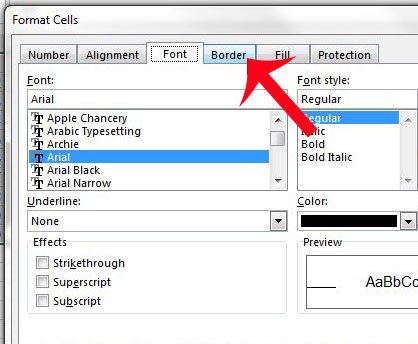
Step 5: Click the Border button at the top of the window.
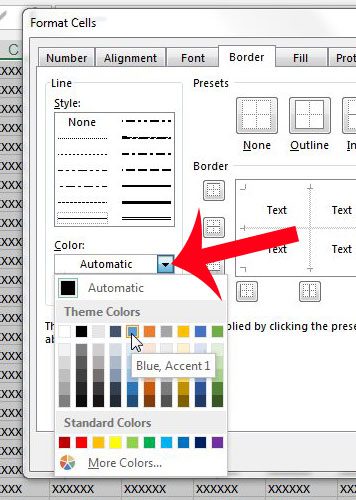
Step 6: Click the drop-down menu under Color, then select the color that you want to use for your borders.
Step 7: Click the buttons around the border preview at the right of the window to add your borders. Click the OK button at the bottom-right corner of the window to apply these border settings to your selected cells.
Now that you know how to change a border color Excel option you will be able to add colors to your spreadsheets and remove unwanted existing colors. Do you need to add a document name, to similar information, to every page of your printed spreadsheet? Add a header in Excel 2013 for a simple way to accomplish this.
Additional Sources
After receiving his Bachelor’s and Master’s degrees in Computer Science he spent several years working in IT management for small businesses. However, he now works full time writing content online and creating websites. His main writing topics include iPhones, Microsoft Office, Google Apps, Android, and Photoshop, but he has also written about many other tech topics as well. Read his full bio here.
You may opt out at any time. Read our Privacy Policy