If you have ever sent an email from your iPhone or iPad without changing any of the Mail app settings, then you likely noticed that it appended something like “Sent from my iPhone” to the end of the email. This is the device’s mail signature, and it is something that you can edit. Your Apple Watch shares much of the functionality of your phone or tablet, and there is a setting on the watch that controls the signature used for emails sent from the device. Our guide below will show you how to edit your watch mail signature to say whatever you want.
How to Edit the Apple Watch Email Signature
Our guide continues below with additional information on changing the Apple Watch email signature, including pictures of these steps.
How to Set the Signature for Emails from the Apple Watch (Guide with Pictures)
The steps in this article were performed in the Watch app on an iPhone 7 Plus, in iOS 10.3.3. The watch being affected by this change is an Apple Watch 2 using the WatchOS 3.2.2 version.
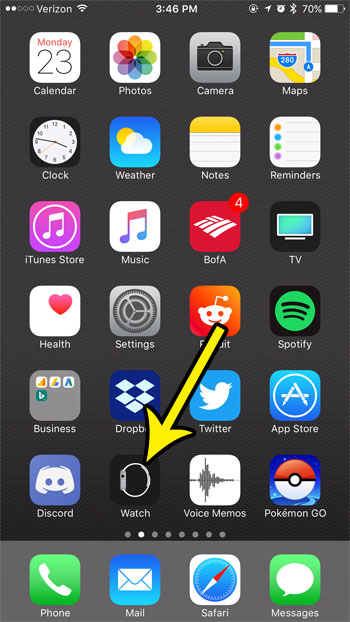
Step 1: Open the Watch app on your iPhone.
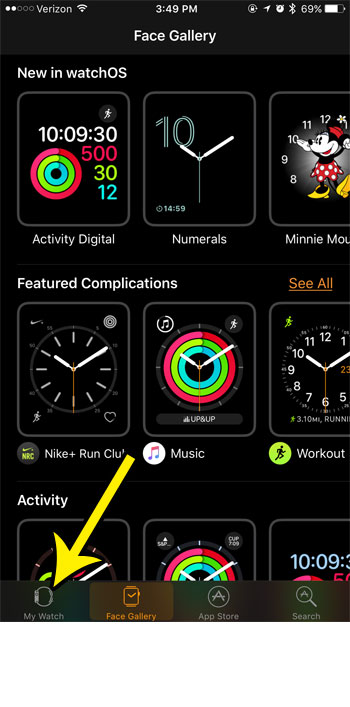
Step 2: Choose the My Watch tab at the bottom-left corner of the screen.
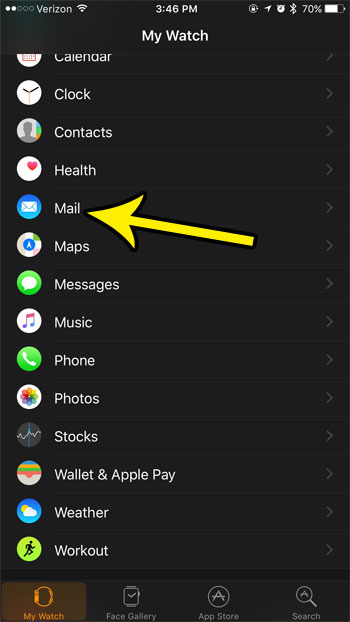
Step 3: Scroll down and select the Mail option.
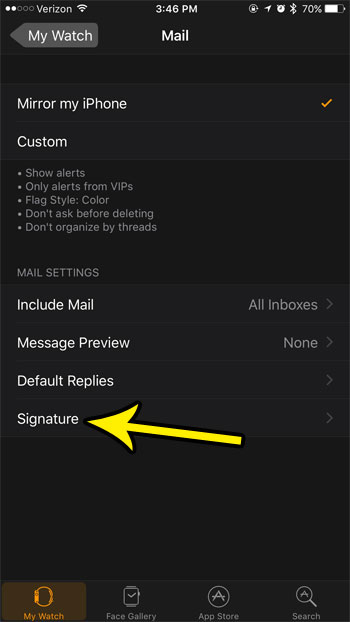
Step 4: Touch the Signature option.
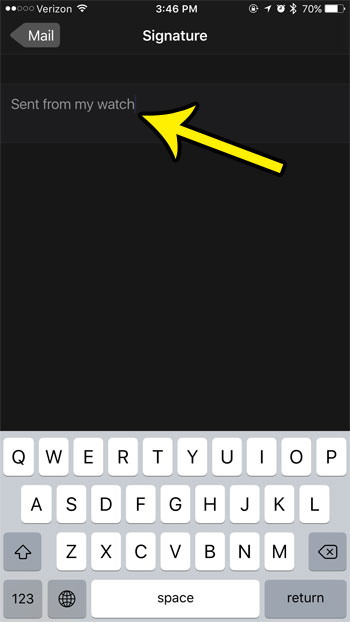
Once you tap Signature you are going to be taken to a new screen where you will be able to create the default signature for messages sent from the watch.
Step 5: Tap inside the text field and edit the existing signature, or add a new signature that you would like to use when you send emails from your watch.
Once you are done, simply tap the back arrow, or press the Home button to close the app. Note that you can leave this field blank if you would prefer not to use any signature at all. Our guide continues below with additional discussion on changing the email signature on your Apple Watch.
More Information on How to Change Apple Watch Email Signature
Using the steps in our guide above is only going to change the signature that is attached to emails that you send from your Apple Watch, It won’t affect other Apple devices that you also use with the same Apple ID, such as your iPhone, iPad, iPad Touch, or Macbook Pro. You don’t need to keep anything in that signature field if you don’t want to. You can simply delete the signature entirely from the signature box and nothing will be added when you send emails. If you have adjusted the signature setting and want to get back to how it was by default, then the signature you need to use is “Sent from my Apple Watch.” Some of the other Mail settings that you can customize for your Apple Watch include:
AccountsInclude MailMessage PreviewDefault RepliesSignature
or if you choose the “Custom” option at the top of the screen you will see this list of options:
Allow NotificationsSend to Notification centerNotifications OffA list of all your email accountsNotification GroupingAccountsInclude MailMessage PreviewDefault RepliesSignatureAsk Before DeletingLoad Remote ImagesOrganize by Thread
The steps in our guide above were performed on an iPhone 7 for an Apple Watch 2 but still work for newer iPhone models like the iPhone 13 and newer watch versions like the Watch series 7. If you would like to customize the email signature for emails that you compose on your iPhone then you can find that setting at Settings > Mail > Signature. If you have multiple email accounts on your iPhone then you will be able to set the same signature for everything, or you can define different email signatures for different mail accounts. This is only going to affect the default email app on the Apple watch. Other apps that you use won’t be changed if you edit the signature using the method above. Is your watch battery dying too quickly? Learn how to use power reserve mode on the Apple Watch and see if it’s something that can be helpful to you as a means to make your typical watch battery life last a little longer.
Additional Reading
He specializes in writing content about iPhones, Android devices, Microsoft Office, and many other popular applications and devices. Read his full bio here.
