This is handy for the attendees to revisit the happenings during the meeting and for others who were unable to attend. Here, we’ll show you how to record a meeting in Microsoft Teams and then where to find and play the recording when the meeting ends.
Record a Meeting in Microsoft Teams
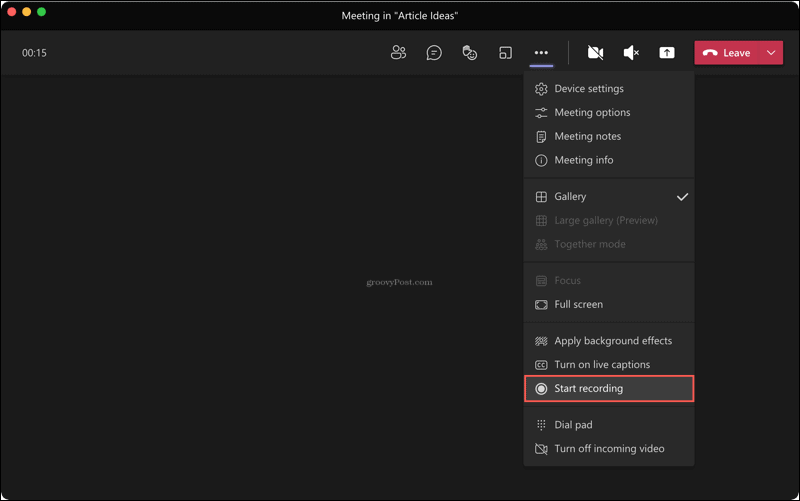
Whether you start your meeting from the Meetings tab, a channel, or chat, you’ll use the same actions to start and stop the recording. At the top of the meeting window, click More Actions (three dots). Select Start Recording.
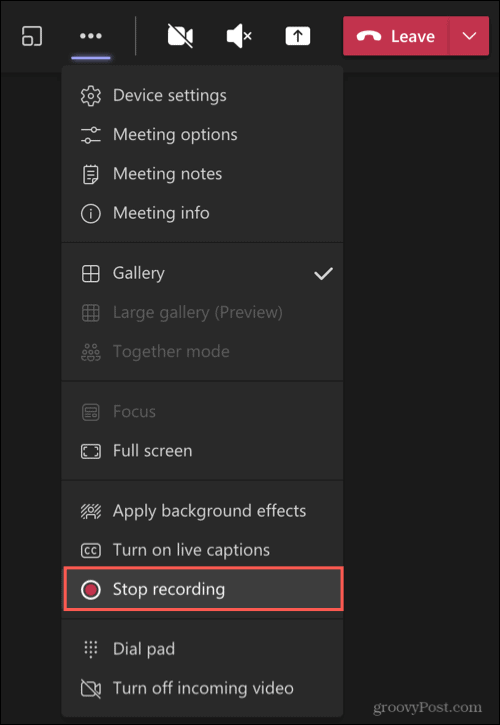
You can stop the recording anytime during your meeting. Click More Actions > Stop Recording.
You’ll see a message at the top of the window letting you know that your recording is being saved.
Locate a Recording in Teams
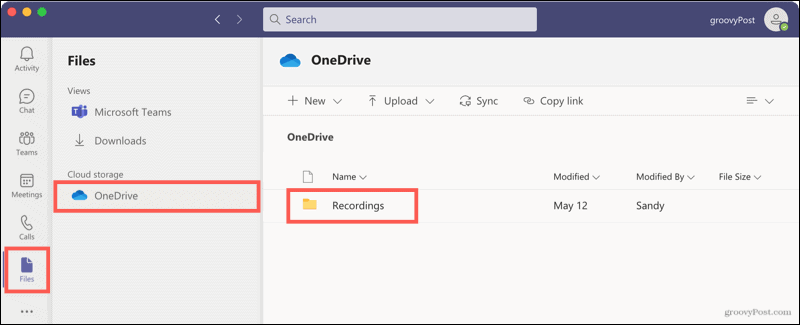
Recordings are saved automatically and reside in a general location in Microsoft Teams. So if you recorded a scheduled meeting, started one on the fly, or used a channel or chat, you’ll find your recordings easily. Click the Files tab on the left. Select OneDrive to the immediate right and Recordings all the way to the right.
You’ll see a list of all recorded meetings. But in addition to this spot, you can open channels and chat meetings from their conversation histories.
Channel Meetings
Open the channel, and you’ll see the meeting in the conversation history. When you click the recording here, you’ll be taken to your browser, where the recording opens online for you to hit Play. Open it in OneDrive or SharePoint specifically, click the three dots on the top right of the recording and pick Open in OneDrive (or SharePoint).
You can also find the recording in the Files area for the channel. At the top, click Files and select Recordings. When you click the recording from this location, it will play within Teams instead of taking you to your browser.
Chat Meetings
Chat meeting recordings work similarly to those for channels. You’ll see the recording in the conversation history. Click to listen, and the recording will open in your browser. You can also click the three dots and choose Open in OneDrive (or SharePoint).
Access Recordings Online
Depending on if your company uses OneDrive or SharePoint, you can access meeting recordings directly from that spot as well. This lets you play a recording from any web browser in one of those two locations.
Rename or Delete a Recording
If you want to rename a recording or delete one altogether, first access the meeting from the Files tab in Microsoft Teams or online via OneDrive or SharePoint. Click the three dots next to the meeting.
Select Rename, type in the new name, and hit Save.
Or select Delete and then confirm this action by clicking Delete again.
Capture Automatic Meeting Notes by Recording Meetings in Teams
Recording meetings, whether they include visuals or audio-only, is a great way to keep meeting notes automatically. You don’t have to try and recall who said what or struggle to remember something you may have missed. For more on using Microsoft Teams, take a look at customizing notifications in Teams or hiding a Teams chat. Comment Name * Email *
Δ Save my name and email and send me emails as new comments are made to this post.


![]()
