But flash drives need to be properly ejected from a computer so that the files stored on them do not become corrupt. You can do this by learning how to eject a flash drive from your Windows 7 computer in our tutorial below.
How to Safely Eject a Flash Drive in Windows 7
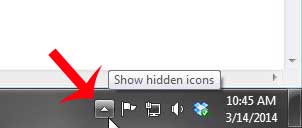
Occasionally you may encounter a situation where Windows 7 will not allow you to eject the flash drive because it is currently in use. This can occur if there is an open program that is using a file on the flash drive. This can typically be fixed by closing the program that is using the flash drive. Other times there may be a process that is running on the flash drive that cannot be terminated. If this occurs, then the safest solution is to shut down the computer, remove the flash drive, then turn the computer back on. Do you need a new flash drive? This 32 GB model is both inexpensive and well-reviewed. Step 1: Click the upward-pointing arrow at the bottom-right corner of the screen.
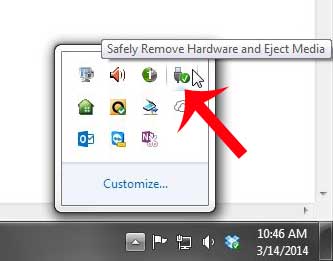
Step 2: Right-click the Safely Remove Hardware and Eject Media icon. Sometimes this icon may actually be in your taskbar, but you are looking for the icon identified below.
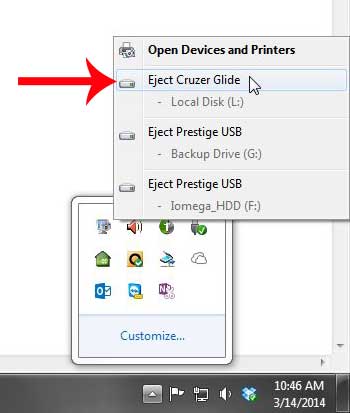
Step 3: Click the flash drive from the list of ejectable drives and media.
Step 4: Remove the flash drive from the computer when Windows indicates that it is safe to do so.
Are you having difficulty putting files from your computer onto your flash drive? This article can help. After receiving his Bachelor’s and Master’s degrees in Computer Science he spent several years working in IT management for small businesses. However, he now works full time writing content online and creating websites. His main writing topics include iPhones, Microsoft Office, Google Apps, Android, and Photoshop, but he has also written about many other tech topics as well. Read his full bio here.
You may opt out at any time. Read our Privacy Policy


