View and Change the Windows 7 Computer Name
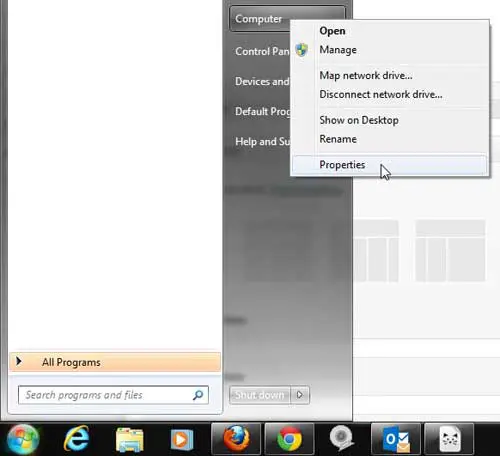
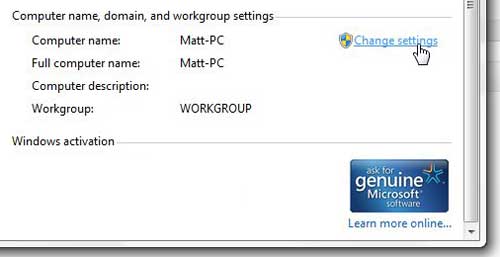
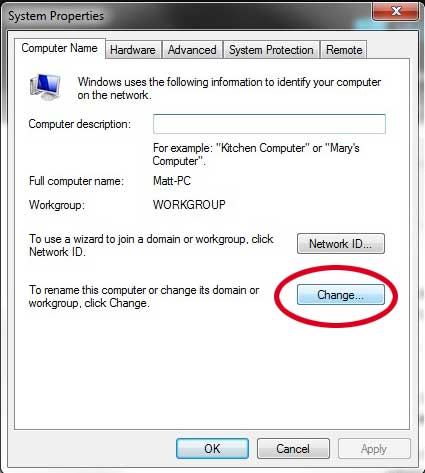
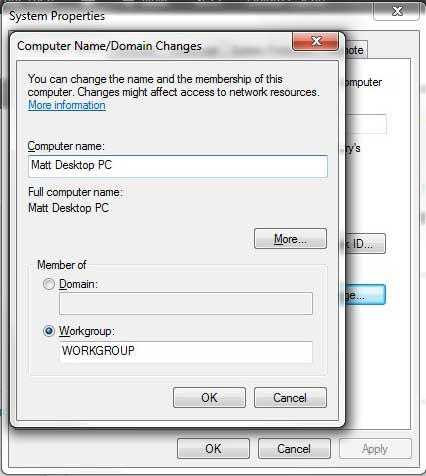
By default, Windows 7 will assign a name to your computer based upon the user name that you have entered. For example, my Windows 7 user names are typically something like Matt-PC. But when I have a laptop and desktop computer connected to my network, both of which bear that name, it can be confusing to try and locate a file or resource on a computer when I can’t properly identify it. So you can follow the steps below to learn how to change your Windows 7 computer name. Step 1: Click the Start button at the bottom-left corner of the screen. Step 2: Right-click the Computer option, then click Properties. Step 3: Scroll down to the Computer name, domain and workgroup settings section, then click the Change settings link to the right of your current computer name. Step 4: Click the Change button at the bottom of the Computer Name tab. Step 5: Click inside the Computer name field and delete the existing name, then enter the new name. Step 6: Click the OK button at the bottom of the window to apply the change. If you have multiple computers on your network that all need Microsoft Office, consider purchasing an Office 2013 subscription. It gives you all of the Microsoft Office programs you might need, plus it allows you to install Office 2013 on up to 5 computers for one price. You can read more about the benefits of an Office 2013 subscription here. After receiving his Bachelor’s and Master’s degrees in Computer Science he spent several years working in IT management for small businesses. However, he now works full time writing content online and creating websites. His main writing topics include iPhones, Microsoft Office, Google Apps, Android, and Photoshop, but he has also written about many other tech topics as well. Read his full bio here.


