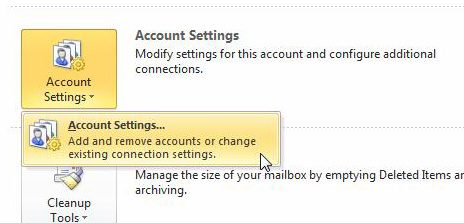
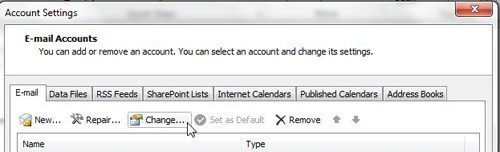
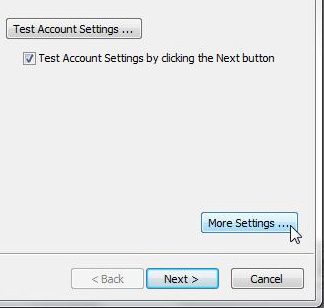
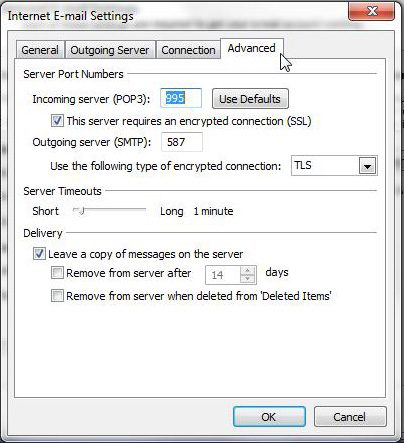
Step 1: Launch Outlook. Step 2: Click the “File” tab at the top-left corner of the window, click “Account Settings,” then click “Account Settings” again. Step 3: Click your account, then click the “Change” button. Step 4: Click the “More Settings” button at the bottom-right corner of the window. Step 5: Click the “Advanced” tab at the top of the window, click inside the “Outgoing Server” field, then change the value to “587.” Step 6: Click the “OK” button, then click “Next” and Finish to apply your changes. If you regularly need to email the same group of people, then find out how to create a distribution list in Outlook and make the whole process much faster for the emails you send to them in the future. After receiving his Bachelor’s and Master’s degrees in Computer Science he spent several years working in IT management for small businesses. However, he now works full time writing content online and creating websites. His main writing topics include iPhones, Microsoft Office, Google Apps, Android, and Photoshop, but he has also written about many other tech topics as well. Read his full bio here.
You may opt out at any time. Read our Privacy Policy